Account Mapping
Login to Google Cloud Console to collect information such as Paying Account Id, Project Id, Service Account Id, Bucket Name, Private Key file path, Usage File Prefix, and Username. These information will be useful for your while configuring your Cloud Credentials in Jamcracker Appliance. Follow the below steps to know how to collect the required information and add them to Add Cloud Credentials page.
- Launch Google Cloud Console and login to the Google Cloud
console using your credentials.
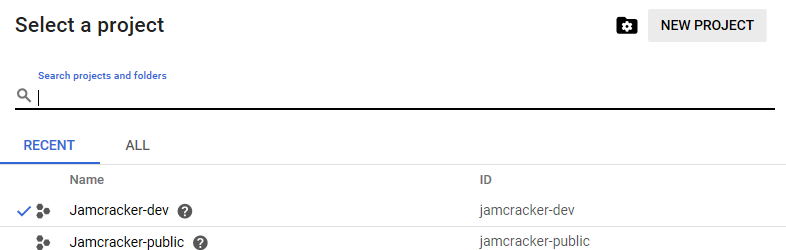
 Note: If you already have an existing project. We recommend you to copy the Project ID, which will be useful while mapping your cloud credentials.
 - (a). Click Select a Project to create a new
project.

(b). Click New Project.
(c). Provide a name for the project and use the default location.
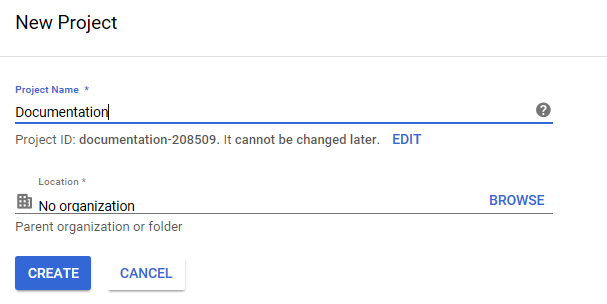
(d). Click Create. The project is created successfully.
Note: A default project ID is allocated to your new project. In case you want to change the project Id, click on Edit and Add New Project ID.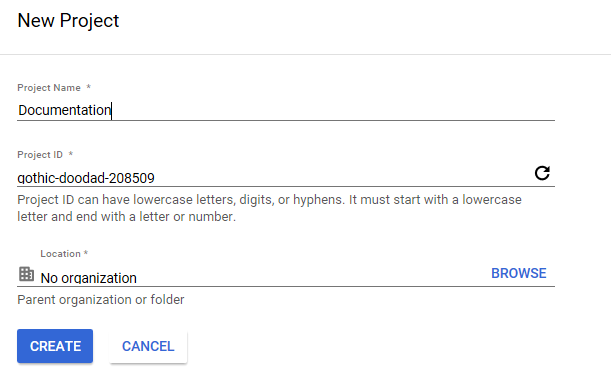
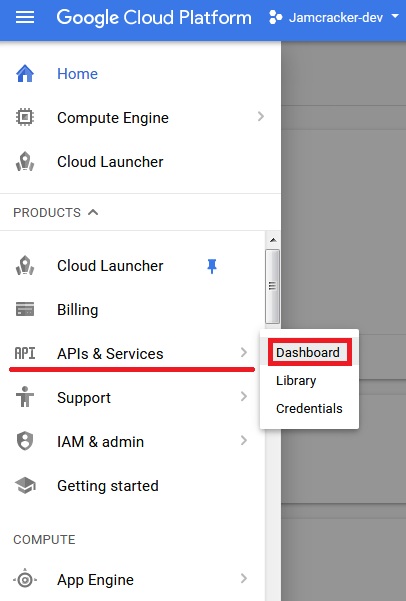
- (a). Select the Project and navigate to Menu > APIs & Services >
Dashboard page and click Enable APIs and Services.
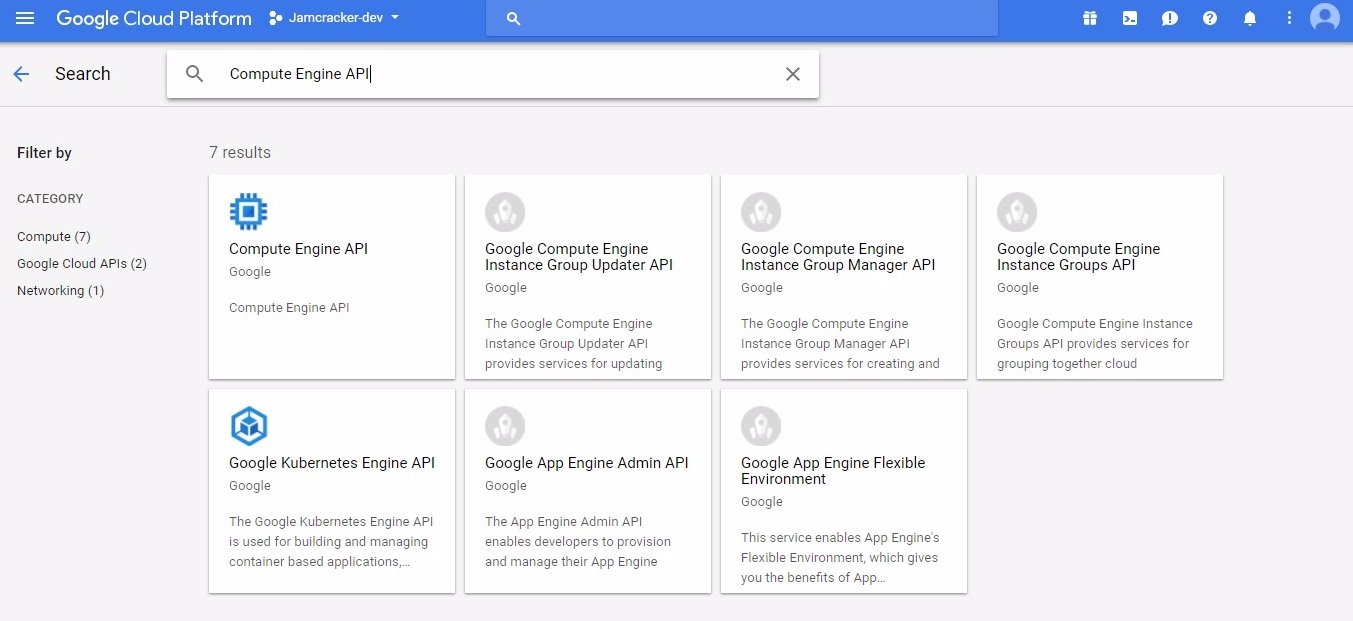
(b). Ensure you enable the below two services. If these two services are not enabled, then search for "Compute Engine API" and "Google Cloud Storage" and click Enable respectively.
- Compute Engine API
- Google Cloud Storage
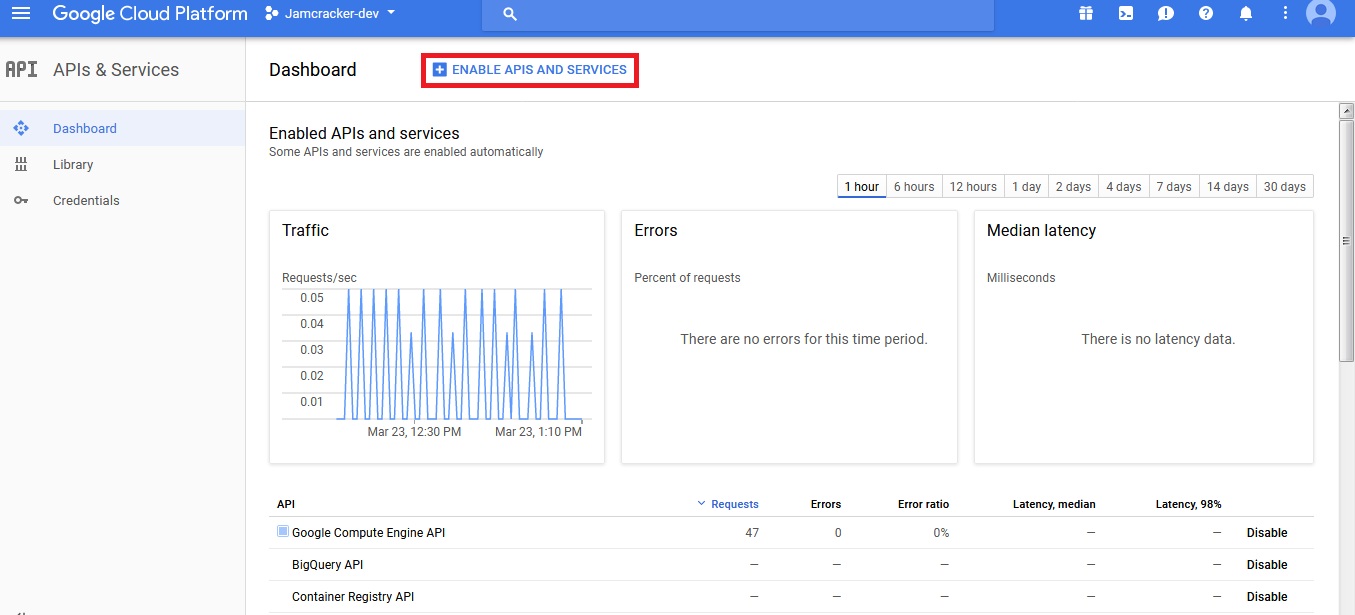
(c). Click Enable APIS AND SERVICES. You will be re-directed to API Library page, search for "Compute Engine API" and "Google Cloud Storage" services and click Enable respectively.
- Now, you have to Create a Service Account. To create a Service Account, select
the project and navigate to Menu > IAM & admin > Service
accounts page.
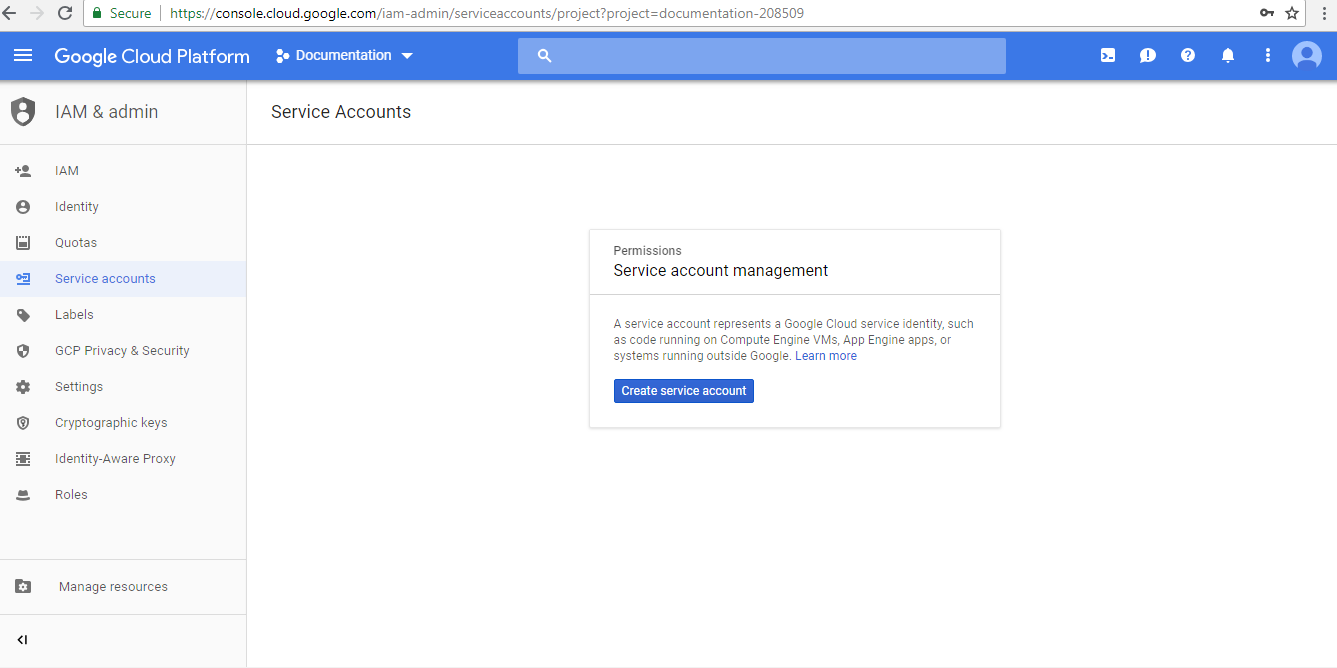
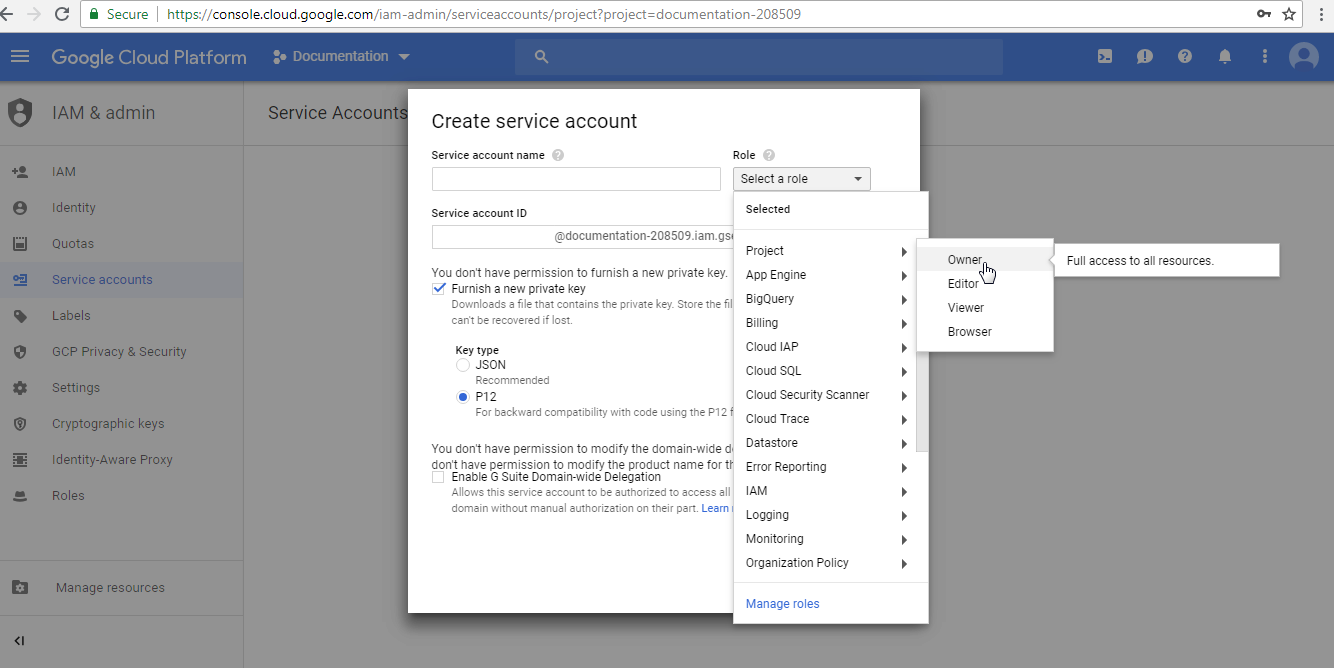
- (a) Click Create Service Account. You must provide a
unique Service account name and select the role as Project > Owner
and click Create. However, before you click Create. Please ensure
you enable Furnish a new private key check-box and select the Key Type
as P12. Make note of “Service Account ID” for future use.
(b). Now, that you have created a P12 Key type, you have to create a JSON Key Type. Navigate to Menu > IAM & admin > Service accounts page. Identify the Service account and click Create Key from the Options column.
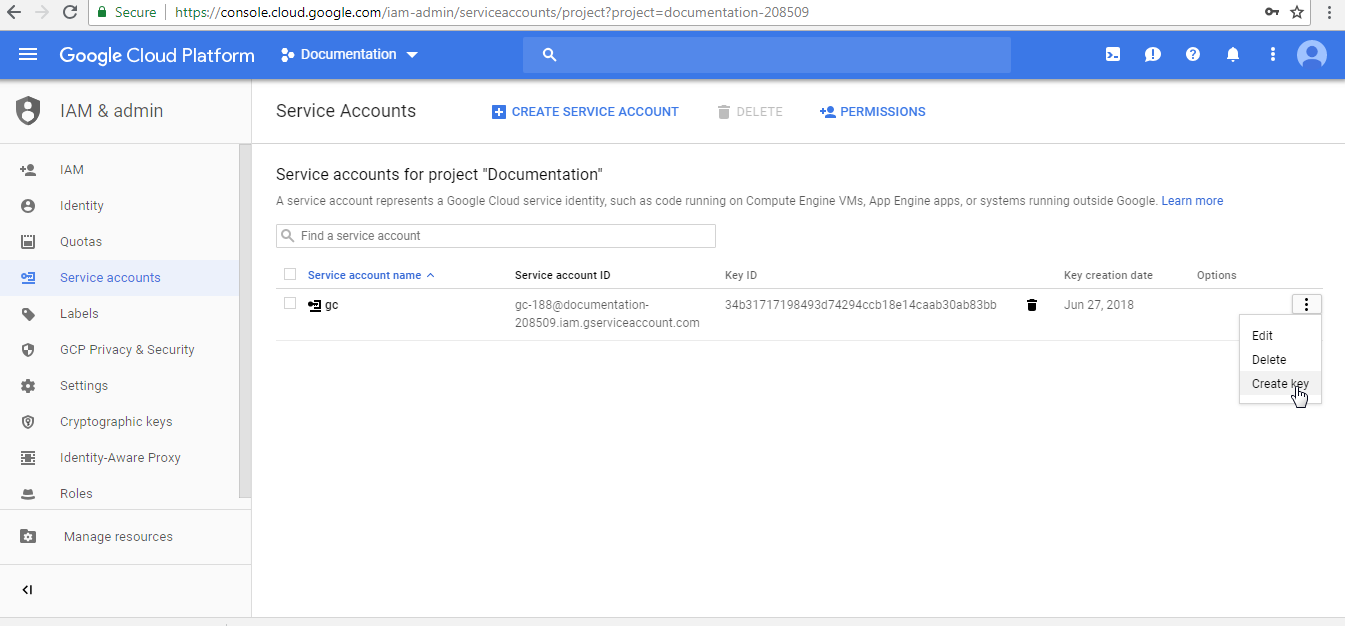
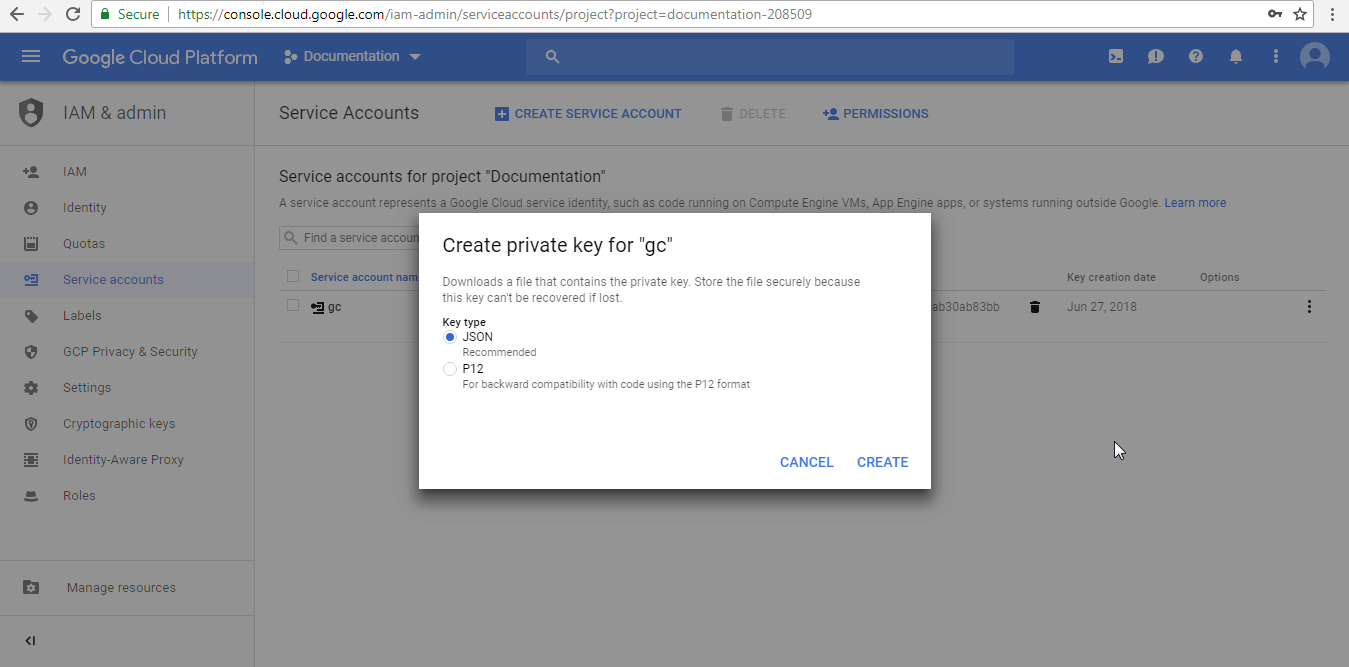
(c). Select JSON as your Key Type. Click Create.
Existing Bucket Mapping
- (a). If you are adding a new project and want to map it to
your existing bucket, then you must provide permissions for storage. To provide
permissions, navigate to Menu > Storage page and select the Project
from the drop-down list.
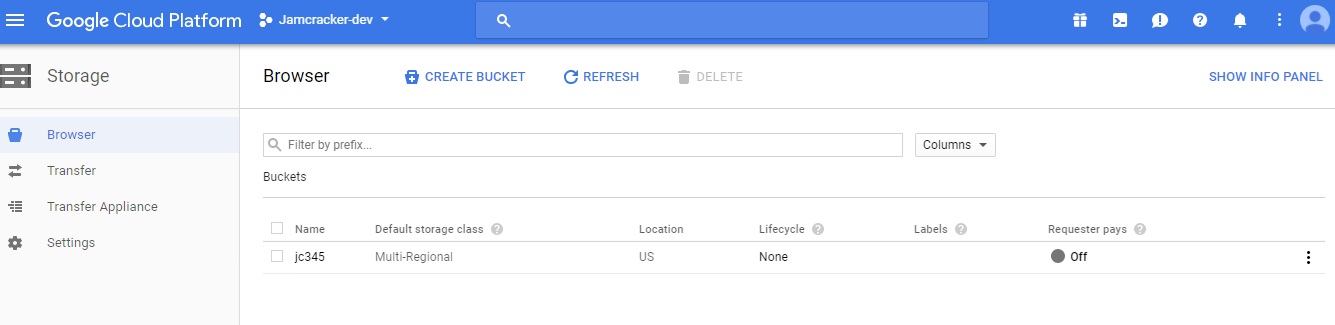
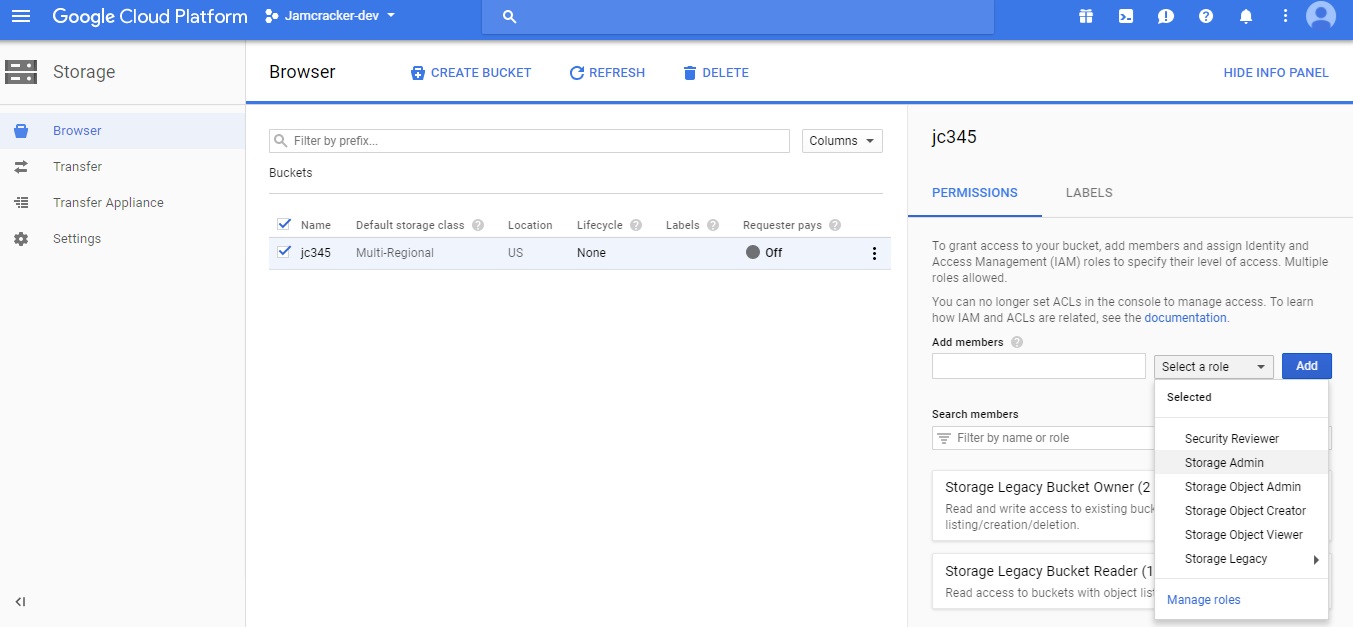
(b). Select the Bucket and click Edit Bucket Permissions.
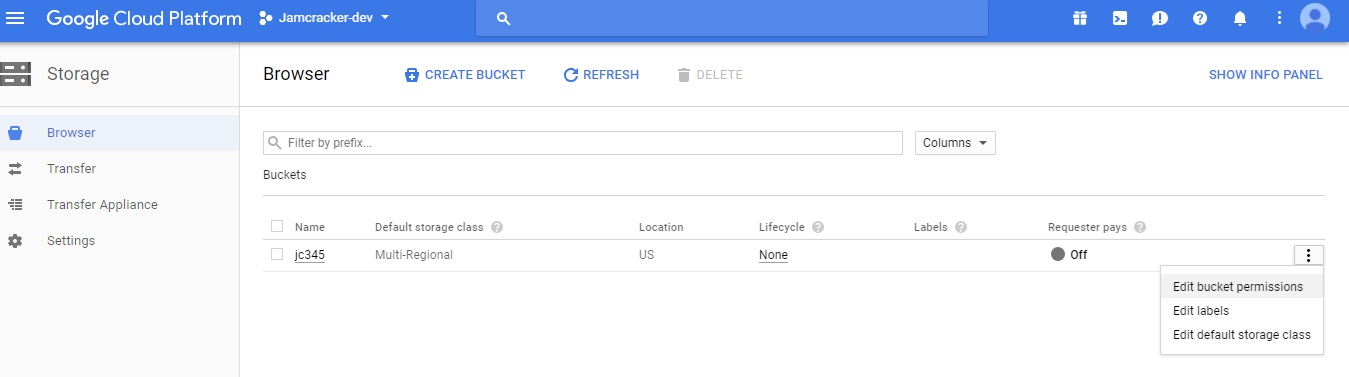
(c). On the Edit Bucket Permissions page. In the Add Member field, provide the Service Account Id (to get the Service Account ID, navigate to Menu > IAM & admin > Service accounts page, identify the service account and you will find the Service Account ID against it) of new project and select Storage Admin from the Role drop-down list and click Add.
New Bucket Mapping
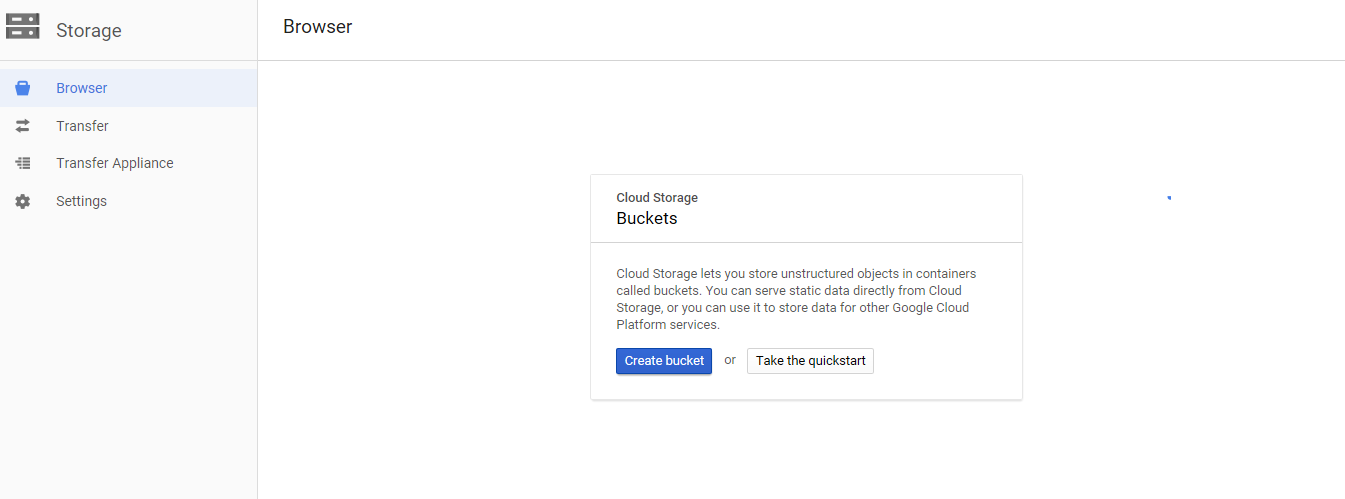
If you don't have an existing bucket, follow the steps below to create a new one.
- (a). In menu option, Click Storage > Create
Bucket.
(b). Provide a unique bucket name, select the default storage class and select the location.
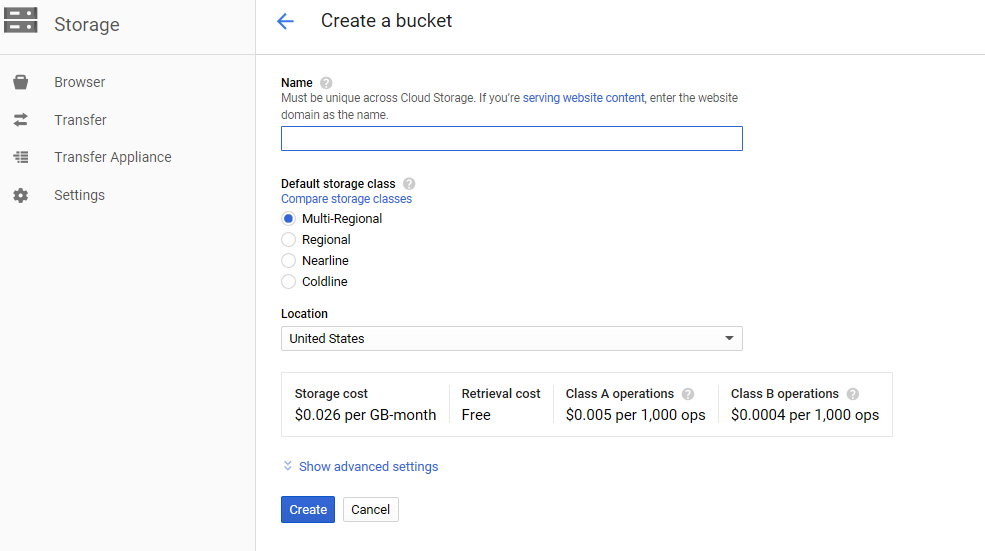
(c). Click Create.
- (a). In the menu option select Billing > Billing Export > File Export >
Enable BillingExport and select the bucket you had created in the
previous step.
(b). Add proper prefix to the selected bucket and select file format as CSV.
(c). Make note of bucket name, report prefix.
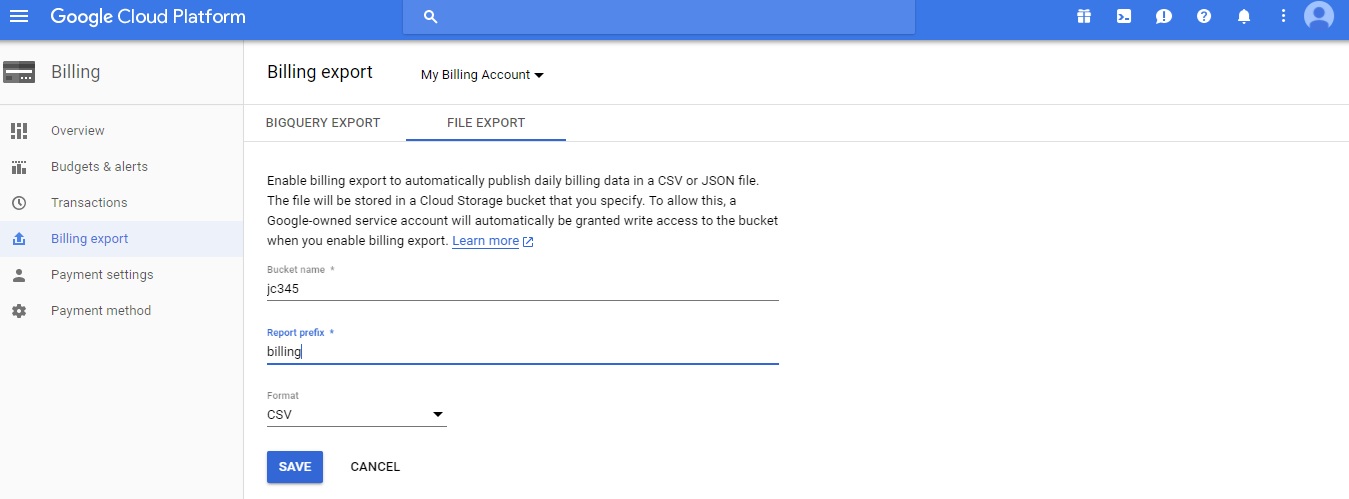
(d). Click Save.
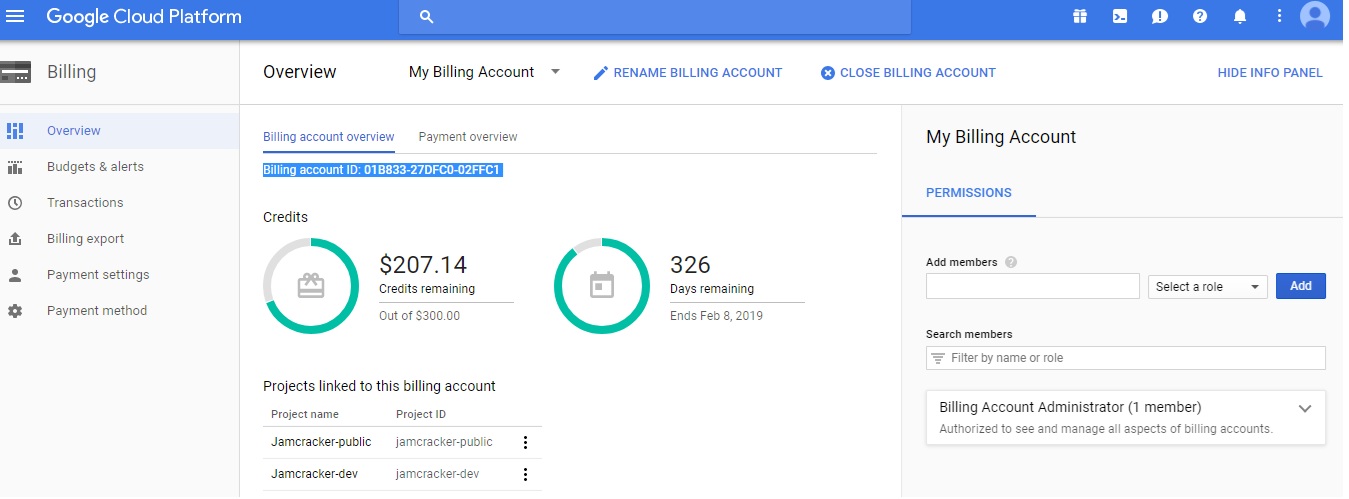
- On the Menu, navigate to Billing > Billing Account
ID page and make note of billing account Id.
- To capture your Domain Name and SAML Name ID, login to GSuite Admin Console using your domain name or username and password.
- Navigate to Menu > Domains page, and make note of your domain name, which will be useful while mapping your account with Jamcracker Appliance.
- Navigate to Menu > Users page, and click on your account. You will find your username (which is your email ID in other words your SAML Name ID), make note of your email Id, which will be useful while mapping your account with Jamcracker Appliance.
- Now that you have all the required information, login to Jamcracker Appliance to map your account.
- Navigate to Manage > Cloud Service Credentials page. On the Cloud
Credentials page, click Add Cloud Service Credentials.
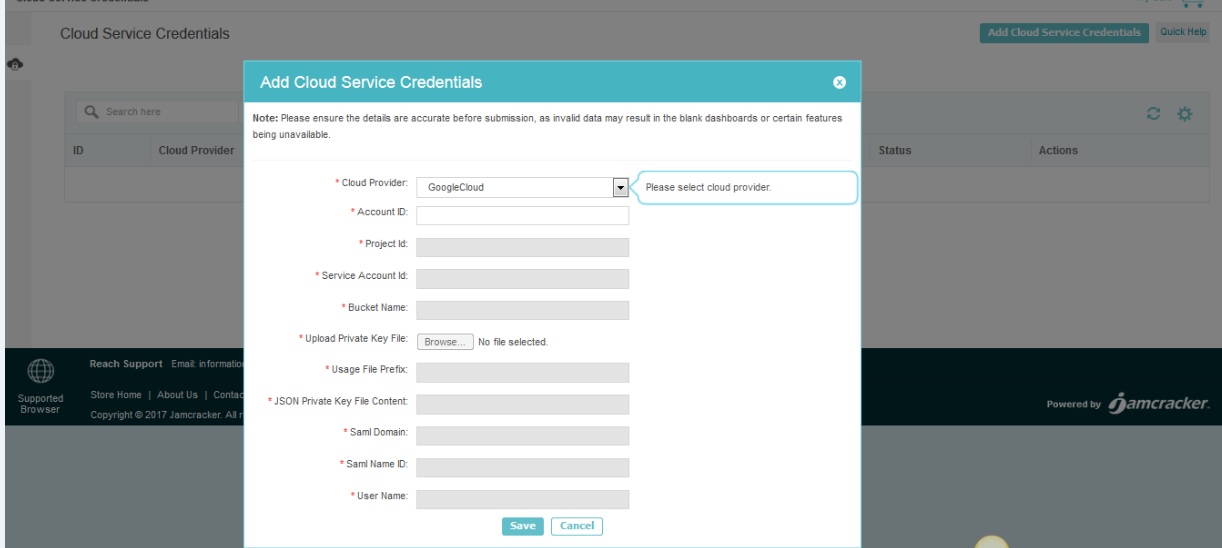
The following table explains the configuration settings fields for Google Cloud Platform.
| Fields | Value |
|---|---|
| Cloud Provider | Select the "GoogleCloud" cloud provider from the drop-down list. |
| Account ID | Type your account ID as your billing account ID. Refer to Step 9. |
| Project ID | Type the Project ID that was allocated to you while creating a new project in Google Cloud. Refer to Step 2. |
| Service Account ID | Type the Service Account ID that is associated with your Google Cloud account. Refer to Step 5 (a). |
| Bucket Name | Type the bucket name, which you have create in Step 7 (a) for new and Step 6 (a) for existing bucket. |
| Upload Private Key Path | Upload P12 Extension file, which you have create and downloaded as part of Step 5 (a). |
| Usage File Prefix | Type the usage file prefix. This will enable you for billing. Refer to Step 8 (b). |
| JSON Private Key File Content | Copy JSON content of the file, which you have created and downloaded as part of Step 5 (b). |
| SAML Domain Name | Enter the Domain name. Refer to Step 11. This field is optional for you. However, if you want to perform SSO, then you must provide your SAML Domain name. |
| SAML Name ID | Enter the SAML Name ID. Refer to Step 10. This field is optional for you. However, if you want to perform SSO, then you must provide your SAML Name ID. |
| Username | Enter your username. The username is the login ID of your Google Cloud console. Refer to Step 12. |
Once you are done with adding the cloud service credentials, refer Step 7 of Adding Cloud Service Credentials.
- You might have provided wrong credentials.
- Latency in data processing.
- If JobServer is down.
- Unexpected special characters in the processing file.