AWS Account Settings
Creation and Configuration of S3 Bucket
AWS provides two types of accounts: Paying & Linked. The Paying account details are the one that you must use.
S3 Bucket is used for storing the usage file created by AWS. This file is updated with the usage data on a daily basis automatically by AWS. Follow the below steps to create a new S3 Bucket. If you already created a S3 Bucket, click here to follow the steps.
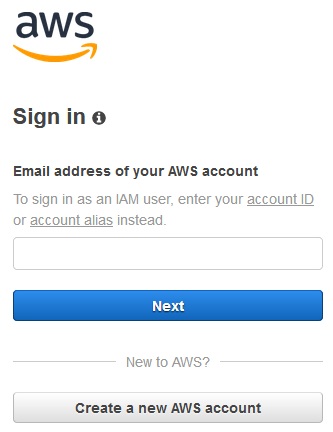
- Launch AWS
Console and click Sign In to the Console.
- Login to AWS Console using your Paying Account credentials.
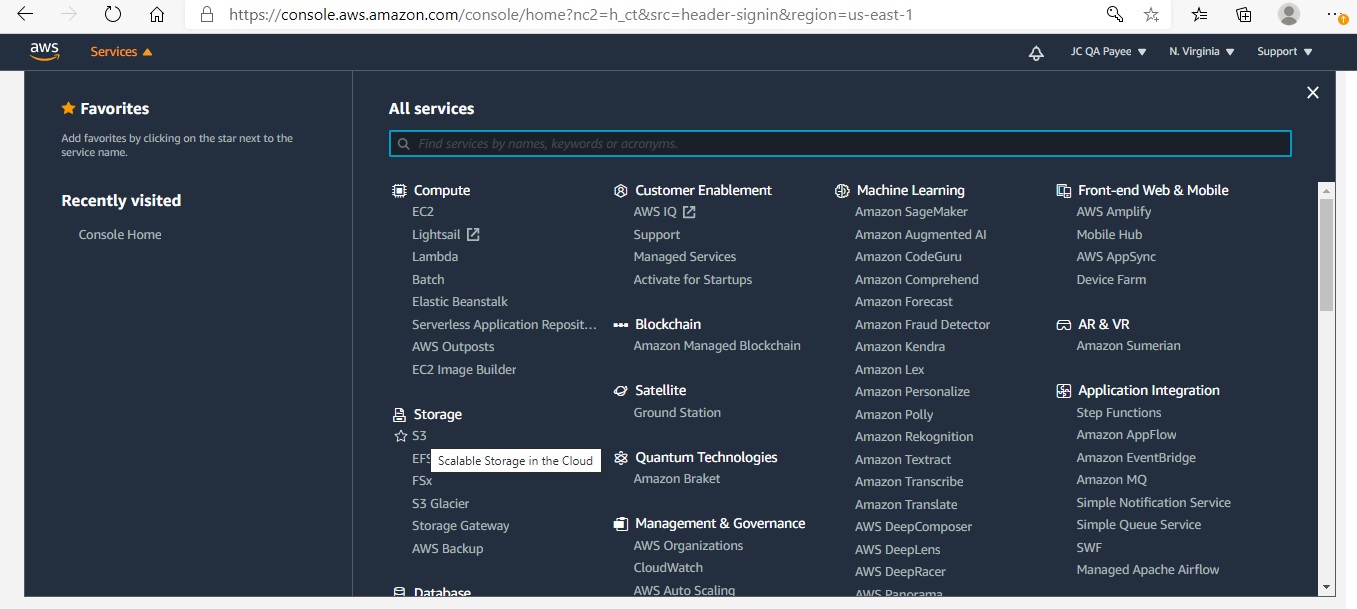
- Navigate to Services > Storage > S3 page on the AWS console.
- ClickCreate Bucket.
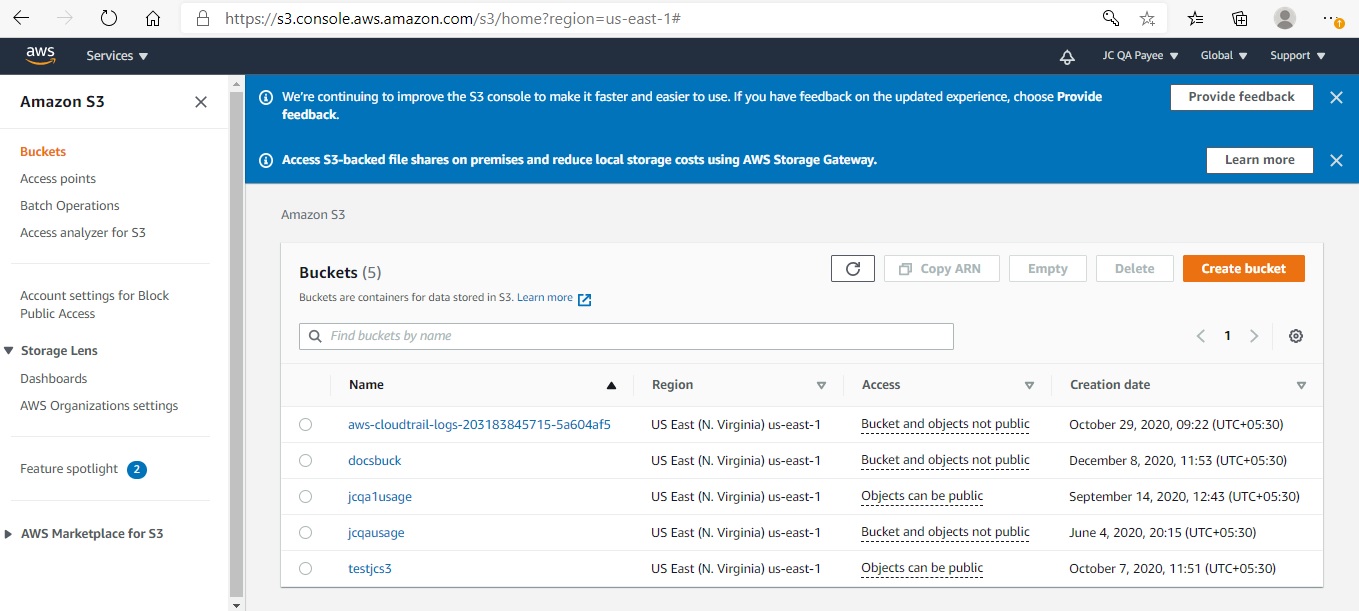
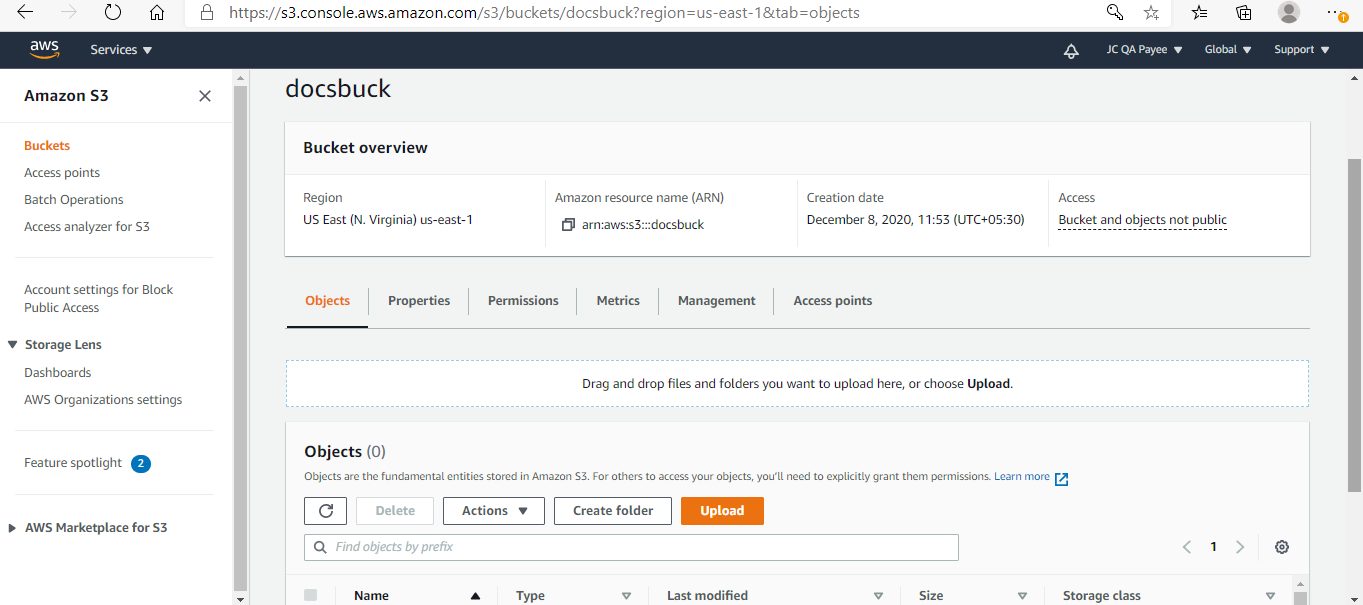
- If you already created a Bucket, then the screen would look as shown below:
- Provide the bucket name and the region under which the bucket should be
created.
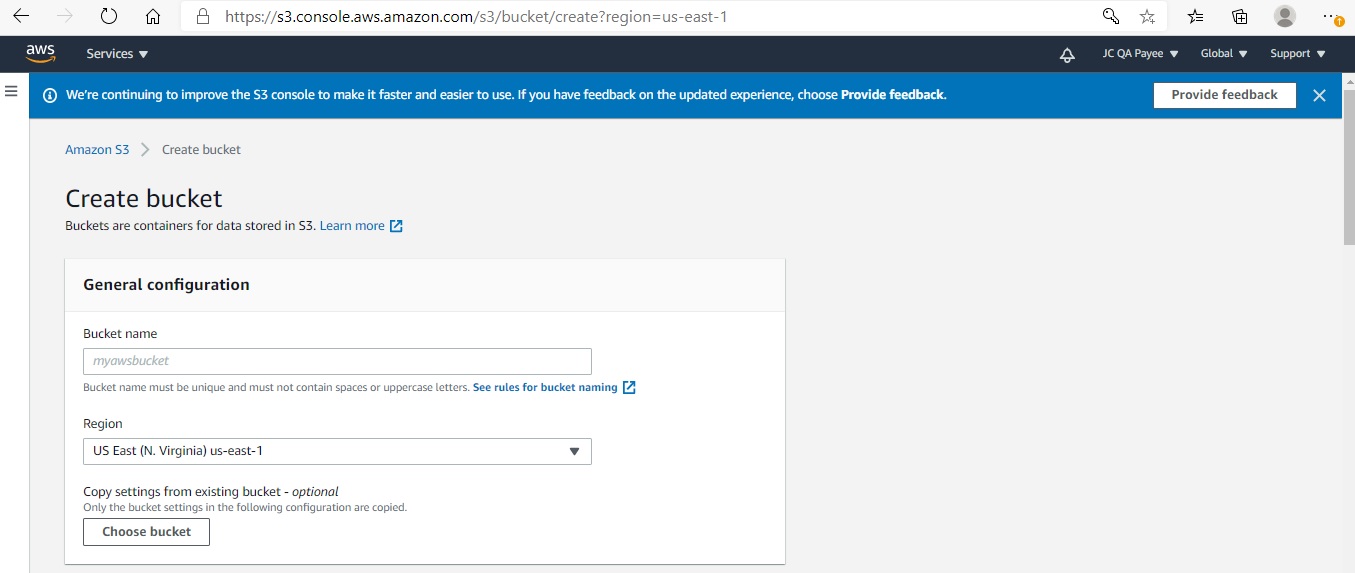
- If the bucket name already exists, then you will have to provide a different & unique name. Please note that the bucket name has to be unique across all accounts.
-
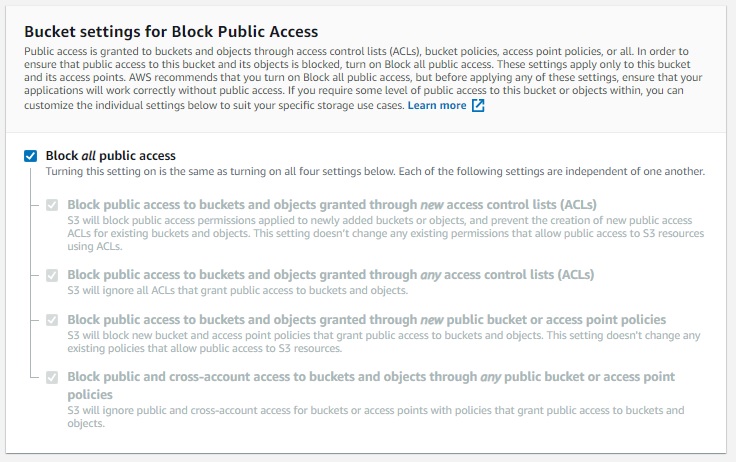
In Bucket settings for Block Public Access, choose the Block Public Access settings that you want to apply to the bucket.
It is recommend that you leave all settings enabled unless you know you need to turn one or more of them off for your use case, such as to host a public website. Block public access settings that you enable for the bucket will also be enabled for all access points that you create on the bucket.
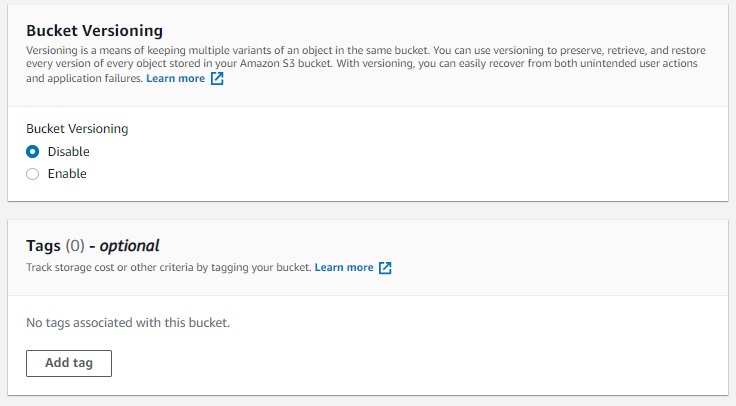
- Provide the details:
- Versioning - Versioning enables you to keep multiple versions of an object in one bucket.
- Tags - Track storage cost or other criteria by tagging your bucket.
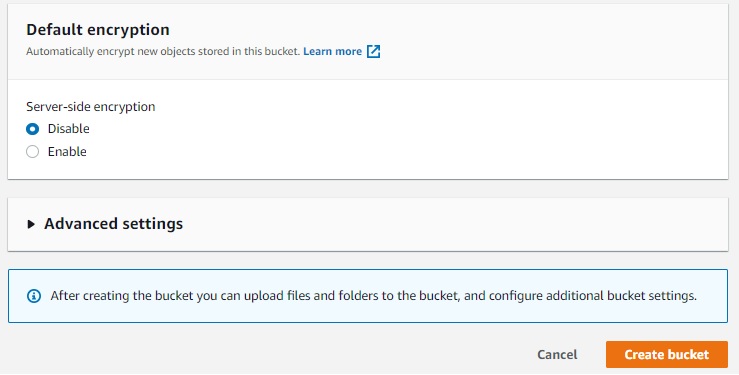
- Default encryption - Default encryption provides a way to set the default encryption behavior for an Amazon S3 bucket.
-
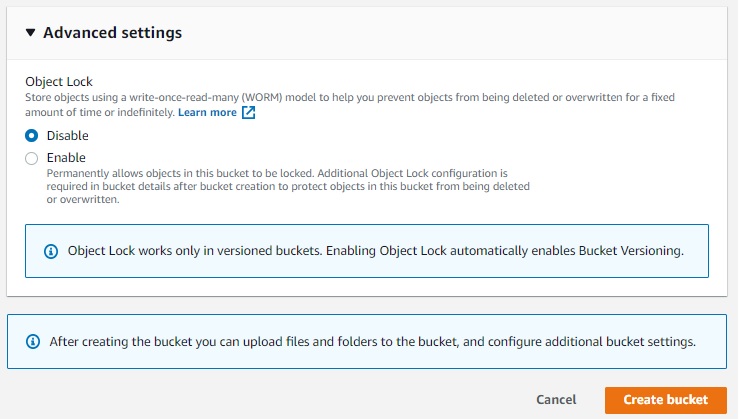
Advance Settings, you will know how to use S3 Object Lock to prevent an object from being deleted or overwritten for a fixed amount of time or indefinitely.
-
Review and click Create Bucket.
- Once a valid bucket name is provided, the newly created bucket will be
listed.
- Click on the newly created bucket.
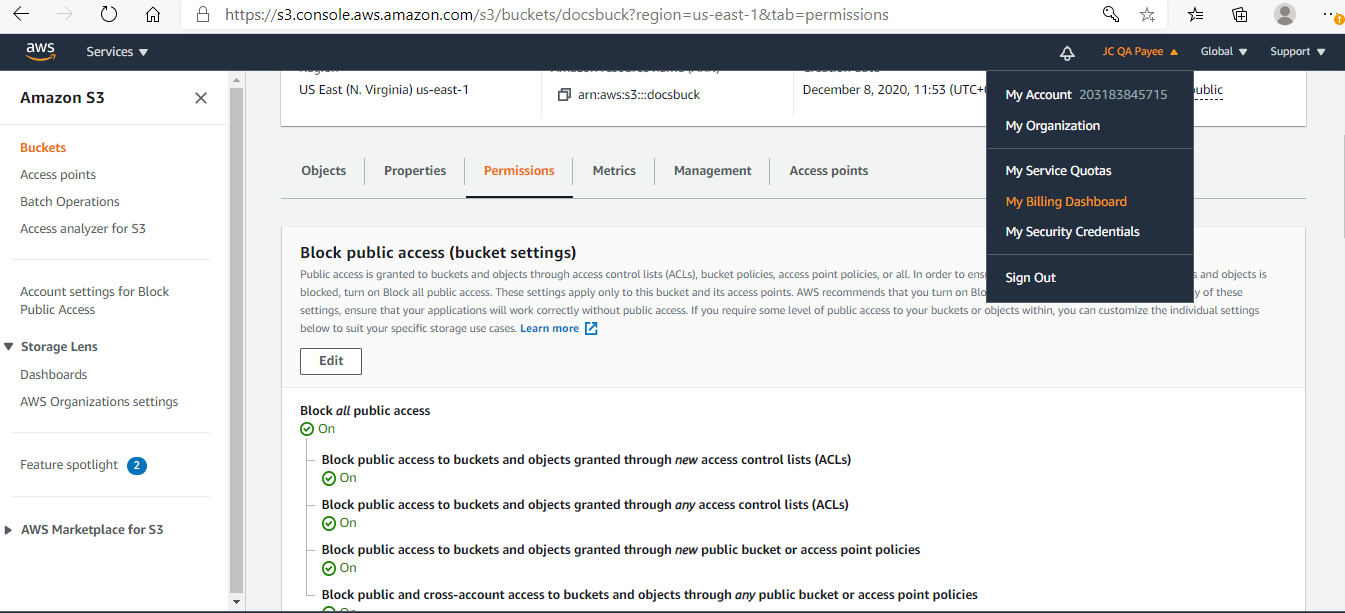
- Click Permissions, and then scroll down to Add Bucket Policy section and click Edit.
- Replace <Bucket Name> with the Bucket Name that you have created and
add the following text in the pop-up box. In the below script the bucket
name demopmjc which was now created has been input in 3
places within the
script.
{ "Version": "2008-10-17", "Id": "Policy1335892530063", "Statement": [ { "Sid": "Stmt1335892150622", "Effect": "Allow", "Principal": { "AWS": "arn:aws:iam::386209384616:root" }, "Action": [ "s3:GetBucketAcl", "s3:GetBucketPolicy" ], "Resource": "arn:aws:s3:::demopmjc" }, { "Sid": "Stmt1335892526596", "Effect": "Allow", "Principal": { "AWS": "arn:aws:iam::386209384616:root" }, "Action": "s3:PutObject", "Resource": "arn:aws:s3:::demopmjc/*" }, { "Sid": "Stmt1353408075866", "Effect": "Allow", "Principal": { "AWS": "arn:aws:iam::386209384616:root" }, "Action": "s3:GetObject", "Resource": "arn:aws:s3:::demopmjc/*" } ] }- Once you enter the bucket in the script, click Save Changes.
- Select My Billing Dashboard from the Paying Account drop-down
list.
- The system will re-directs you to the Dashboard page.
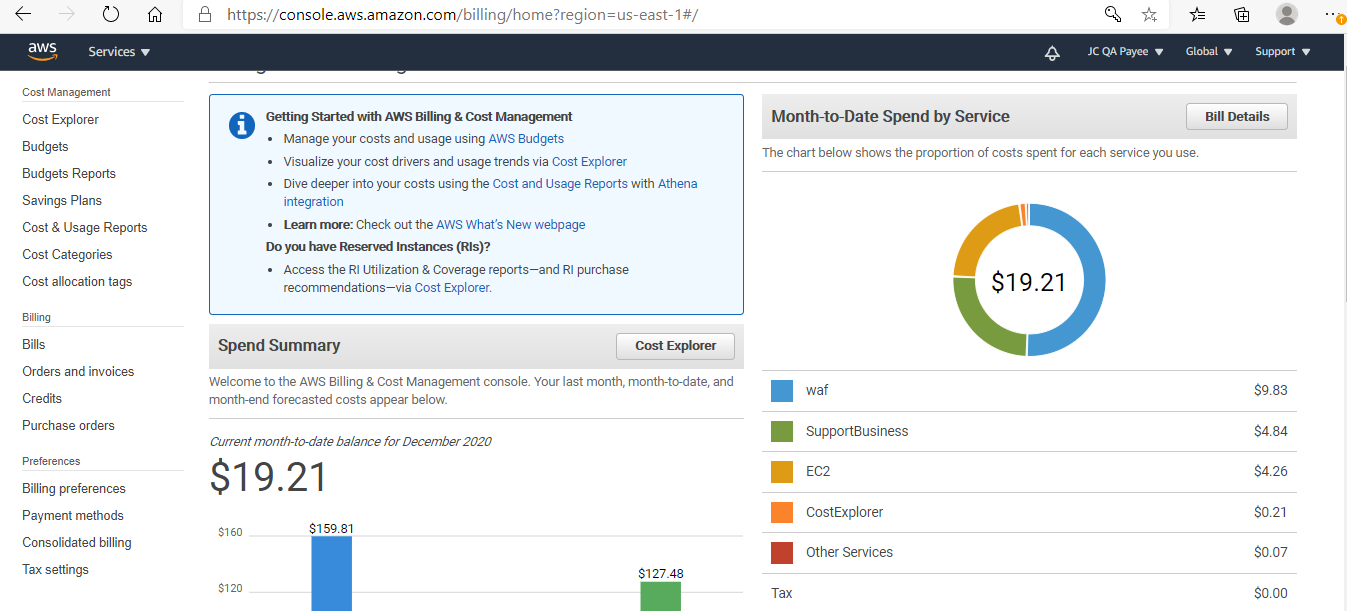
- Once you land in this page click Billing Preferences which is listed on
the left side of the page.
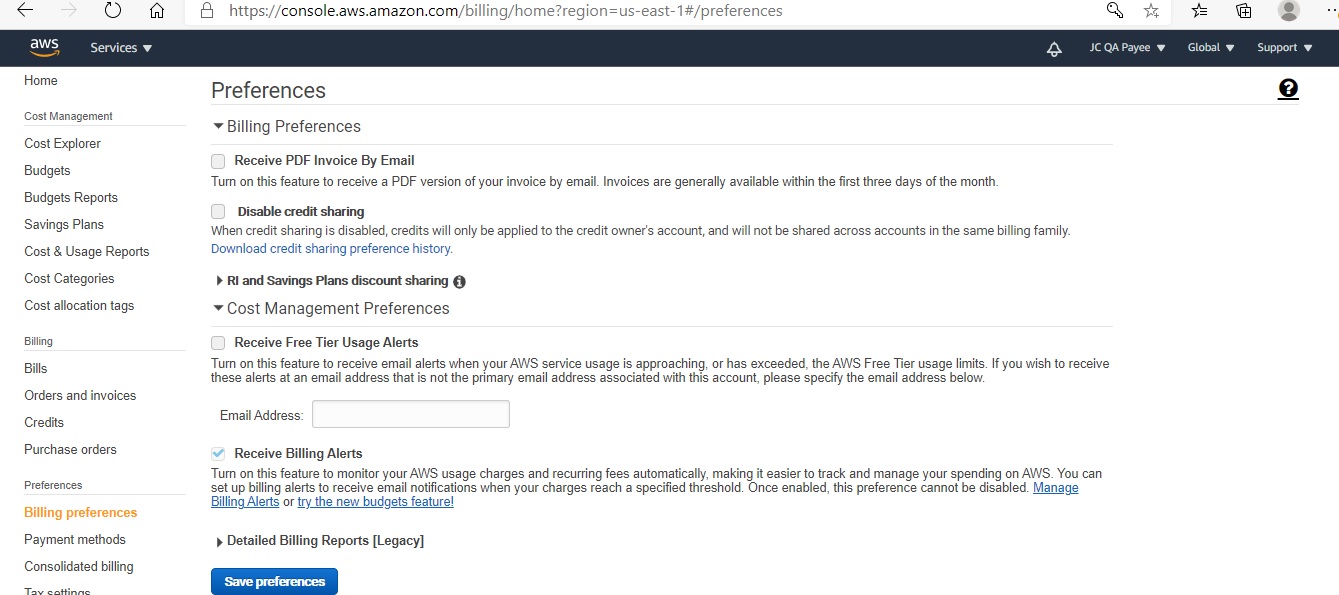
- Expand Detailed Billing Report section and click Configure to configure the bucket and Verify button.
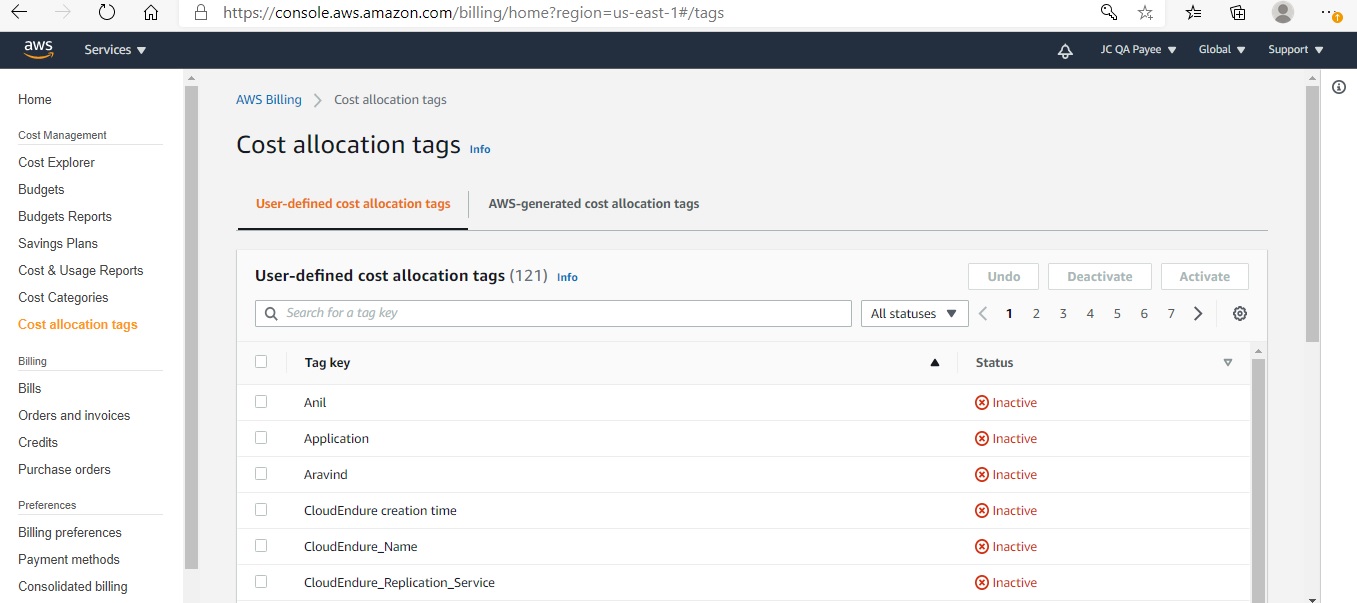
- Select My Billing Dashboard from the Paying Account drop-down list
and navigate to Cost Allocation tags page.
- (b) Provide a Key Value pair as "server_meta_key" and Name" and click Save.
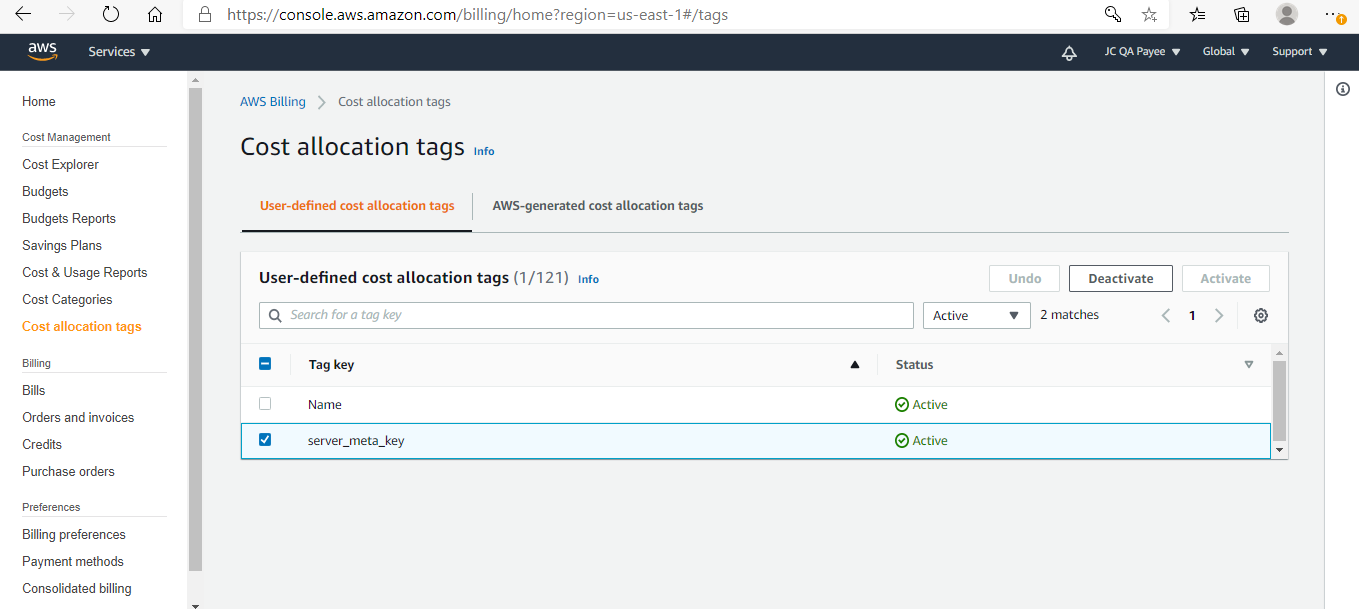
- Select the Tag Key check-box and click Activate.
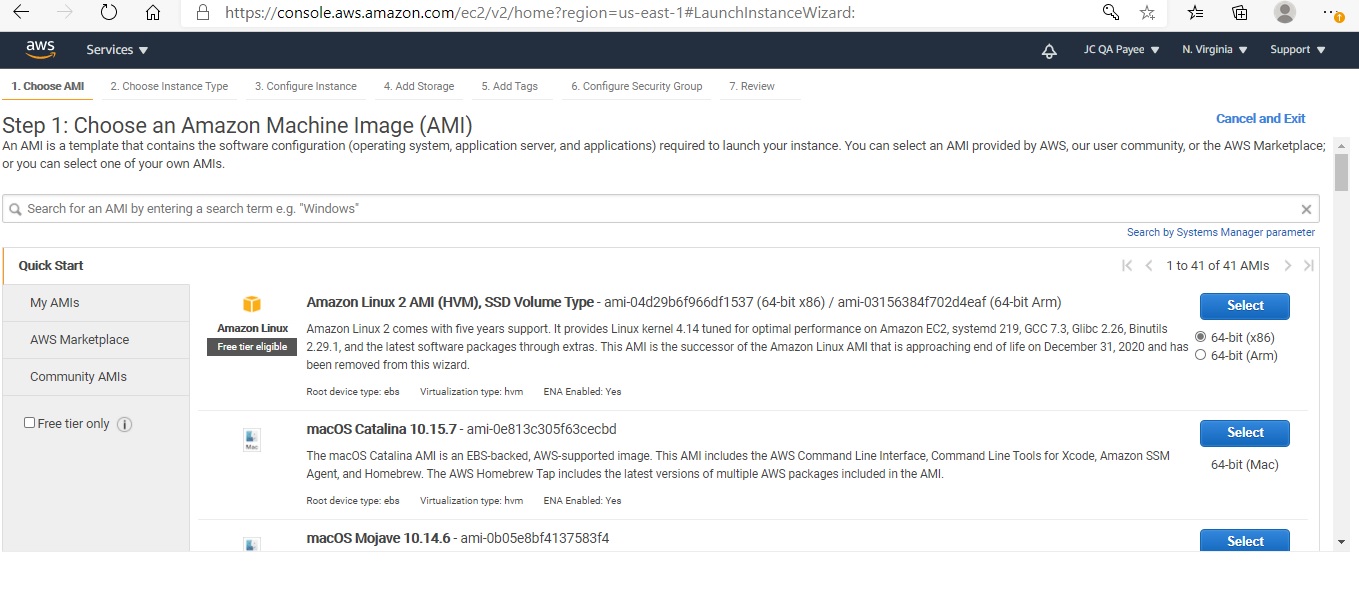
- Go to EC2 console and click Launch Instance and
follow the steps below:
OR
Using JSDN, launch an instance now. This would end up creating few tags that we need. Once the instance is launched through JSDN, then go ahead and terminate as well.
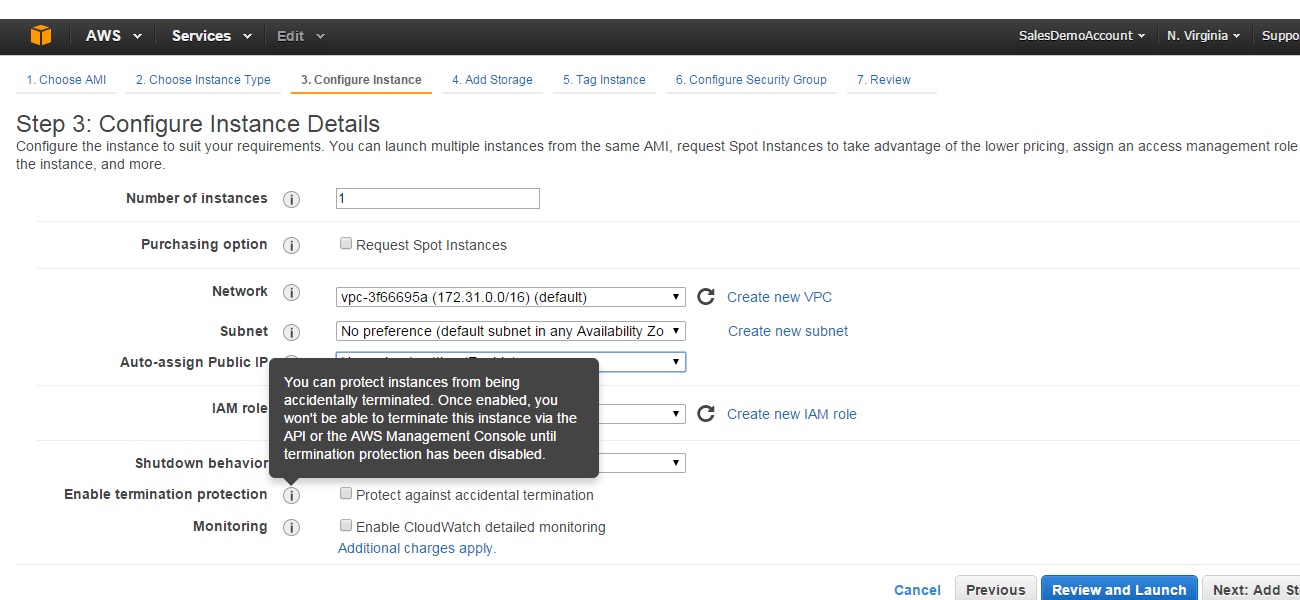
- Keep the defaults as is and click Next. Configure Instance Details.

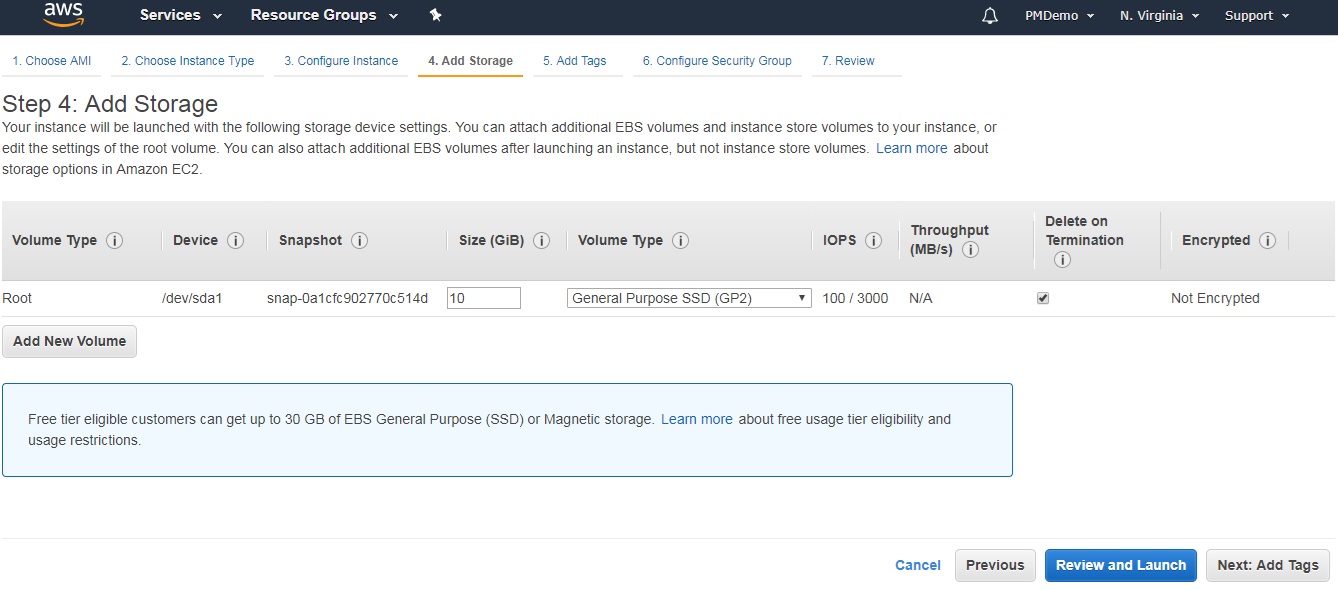
- Keep the defaults as is and click Next. Add Storage.
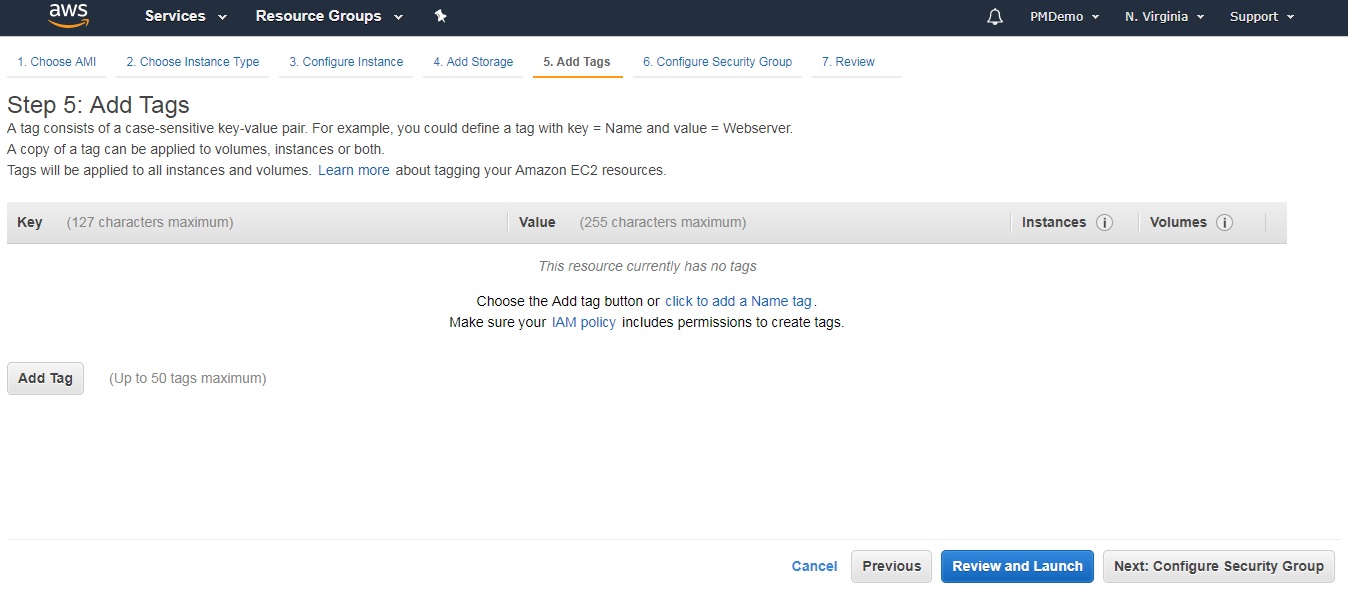
- Keep the defaults as is and click Next. Add Tags.
- Input Key and Value eg : Key can be your client and value can be your client
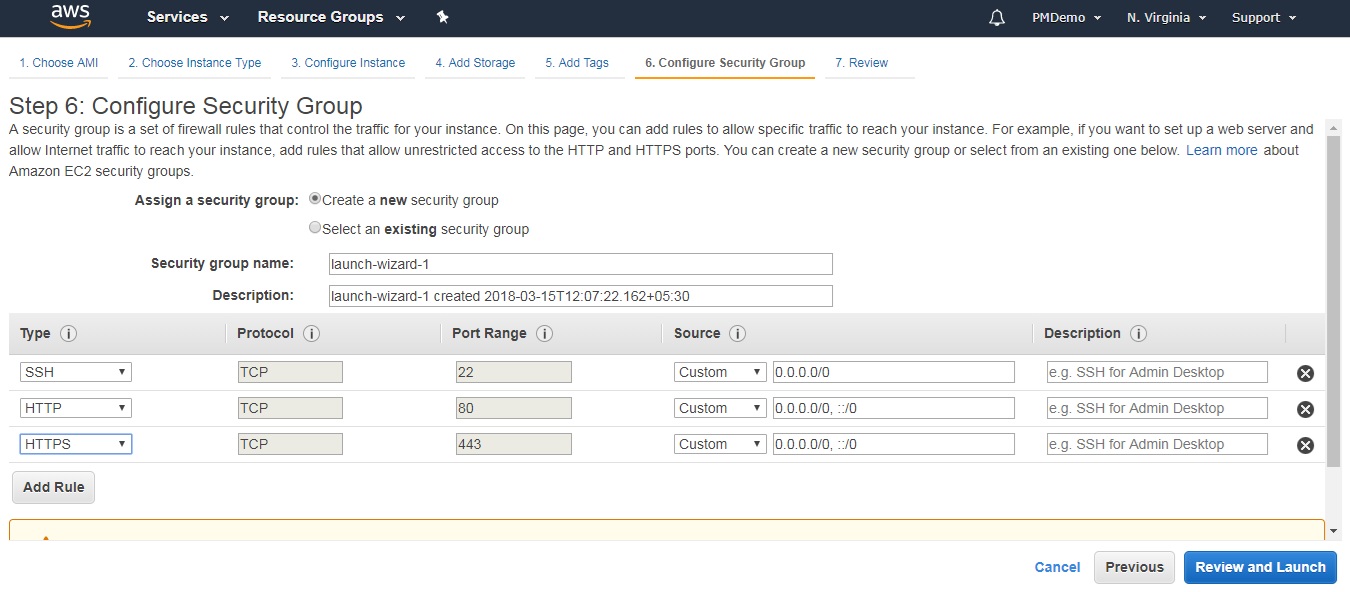
name and click Next. Configure Security group.
- ClickAdd Rule.
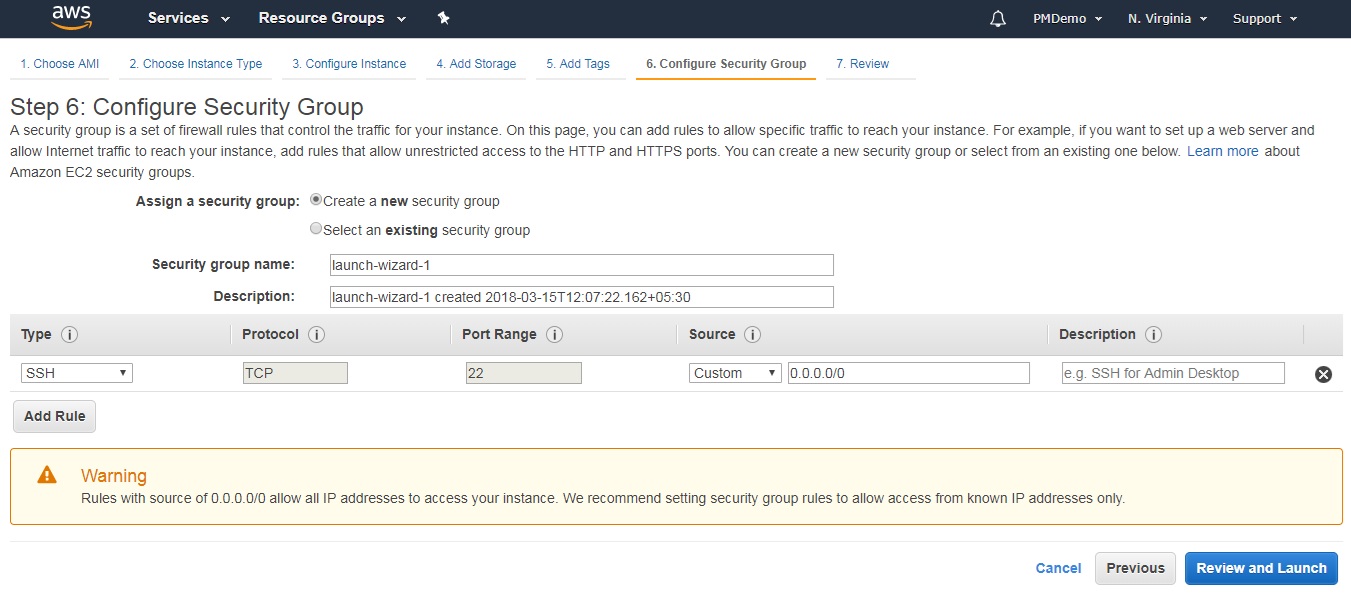
- Add HTTP and HTTPS in the add rule. This is required to access the JSDN portal
after the instance is launched and click Review and Launch.
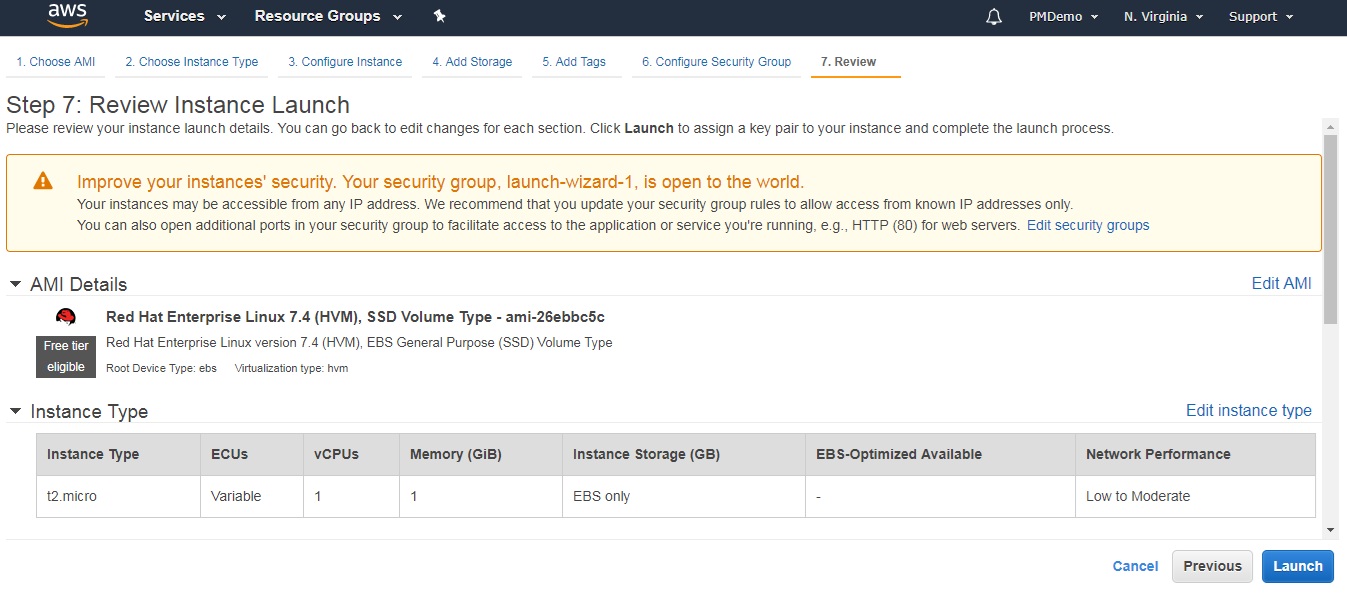
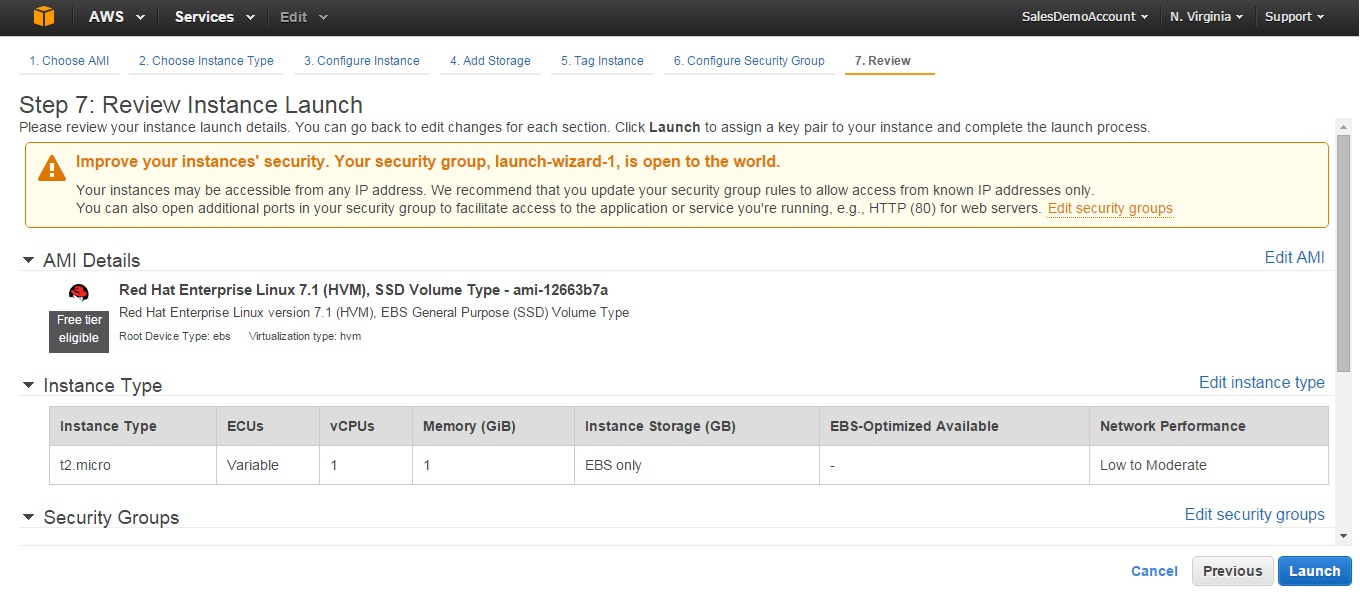
- You will be re-directed to launch the instance, use the scroll bar on your right
to review all the details you have entered and then Click Launch.
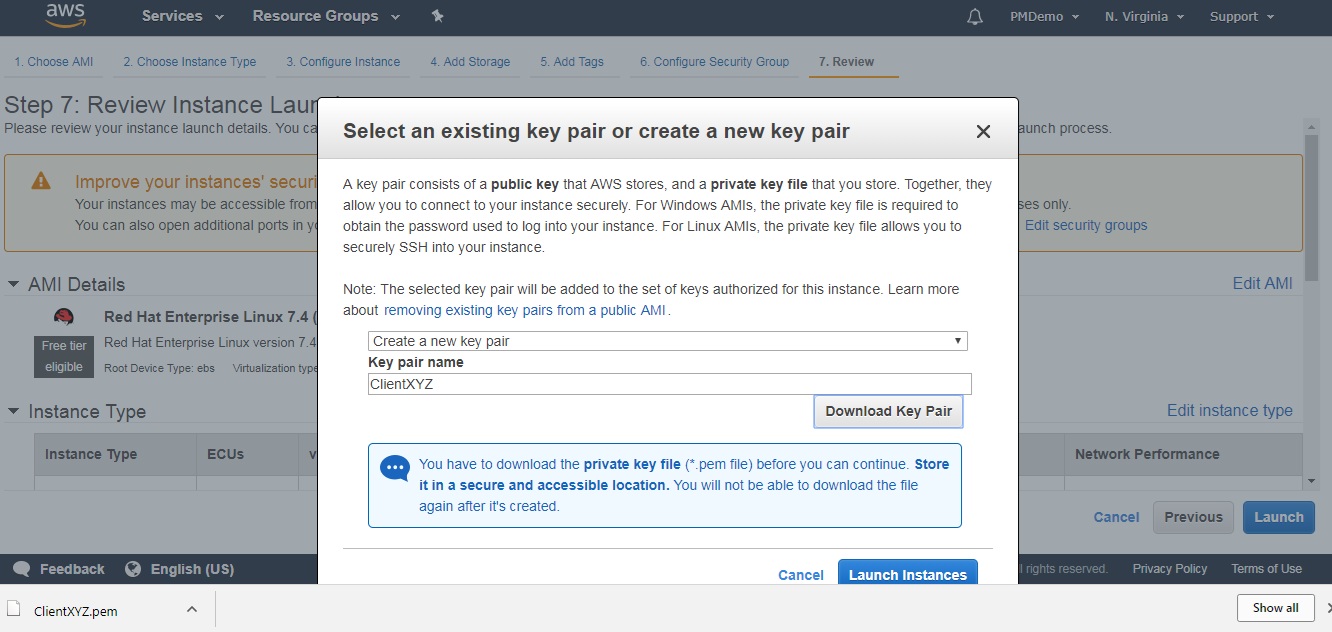
- Once you click Launch you will be asked to select an existing key pair or
create a new key pair, as you are doing it for the first time you would have to
give a key pair name and download the key pair. This is required to log into the
Red Hat Linux OS which you would have selected.
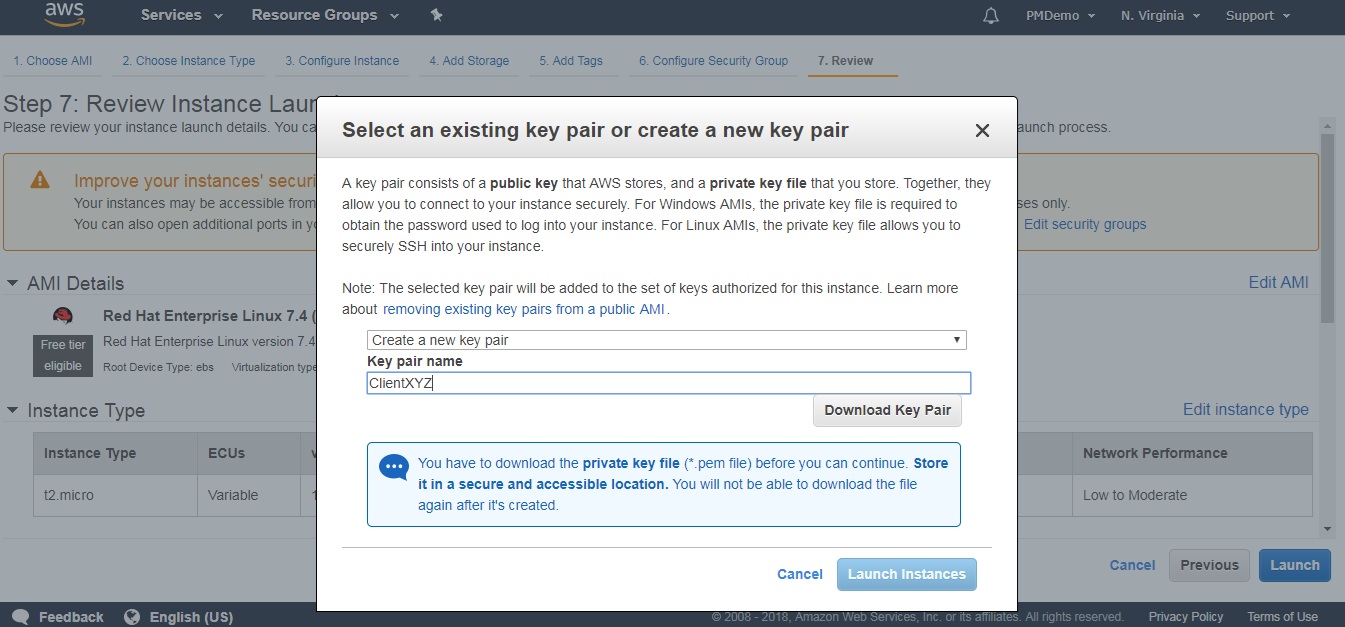
- The .pem file will get downloaded to you local machine only after this is
complete you can launch the instance.
- Once you click Launch, you will land on the following page which would
give you the launch status.
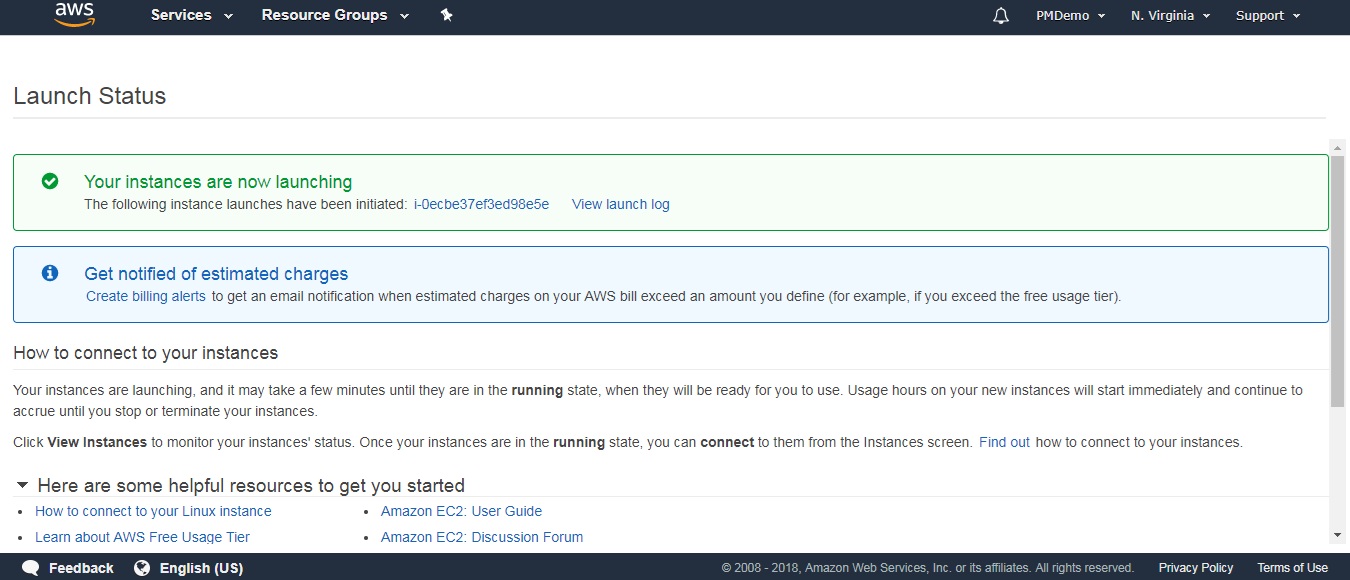
- Use the scroll bar on the right and drag down to click View
Instances.
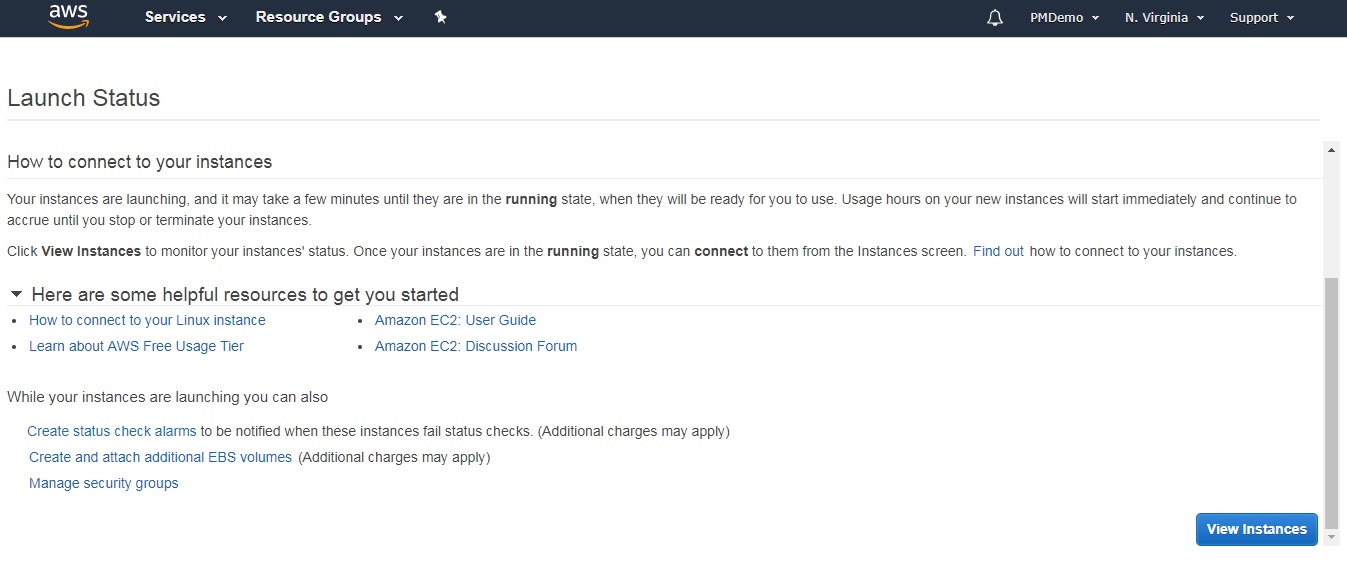
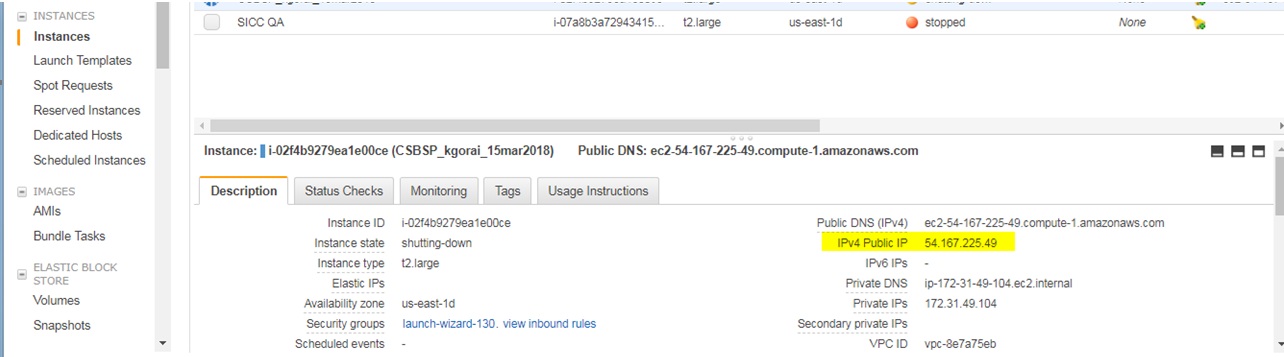
- Your can see the public IP address below which has appeared following the
instance creation. This complete the launch of an instance and concludes the S3
Bucket Configuration.
Creation of Access Key and Secret Key
You need to perform the following steps at every account level (including Linked accounts) to get the Access keys and Secret keys.
To create access keys, perform the below steps:-
- Log into AWS Console as a paying account admin.
- Hover the mouse on the account name and click My Security Credentials
option from the drop-down.
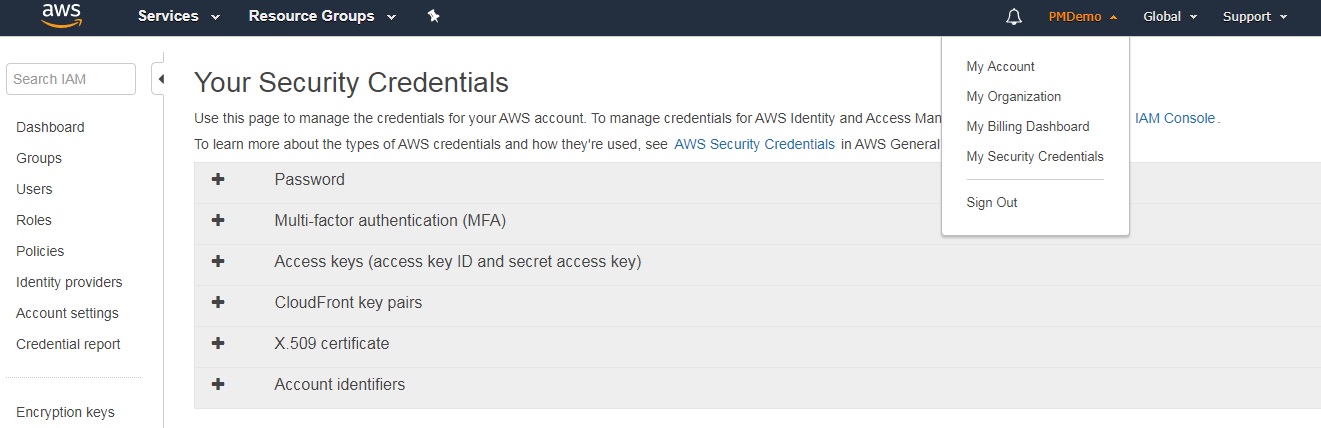
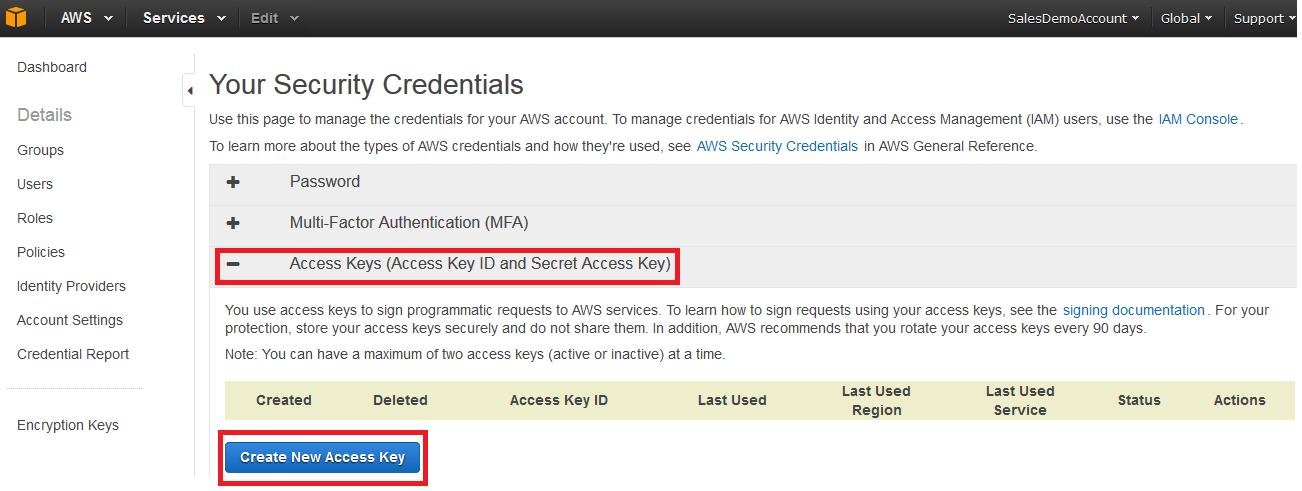
- On the security credentials page, click Access Keys (Access Key ID and Secret
Access Key)’ and expand the field. You can create new security
credentials by clicking on Create New Access Keytab.
- After clicking the Create New Access Key,a pop-up window is displayed
requesting you to download the newly generated key pairs. Click Download Key
File and save the security credentials. The downloaded key file will
have both Access Key and Secret Key. These keys will be used to access a remote
computer through a secure way.
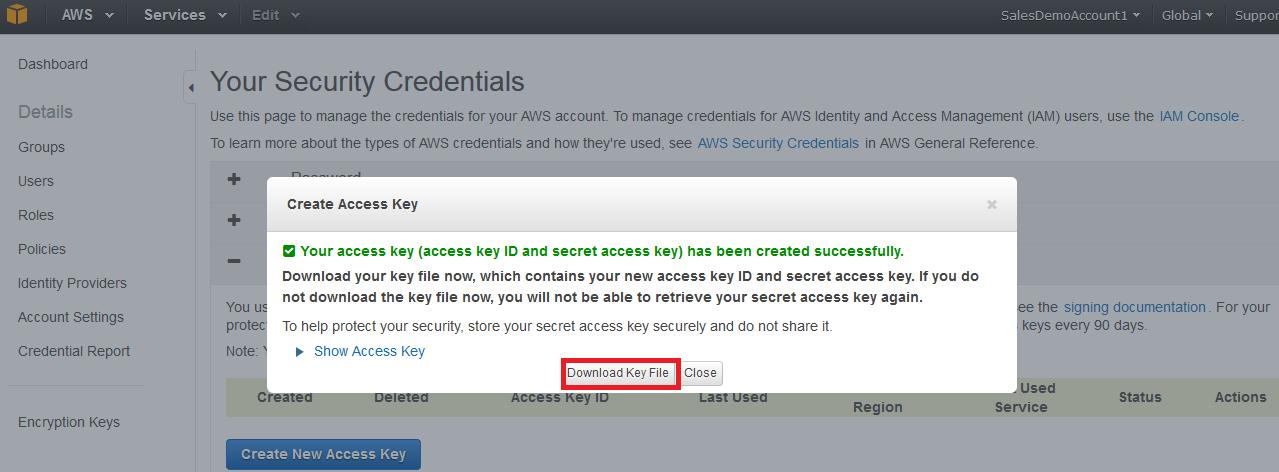 Note: If you do not write down the key or download the key file to your computer before you press "Close" or "Cancel" you will not be able to retrieve the secret key in future. Then you'll have to delete the keys which you created and start to create new keys.
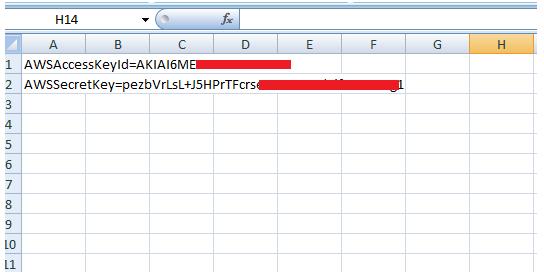
Here's the downloaded file sample.
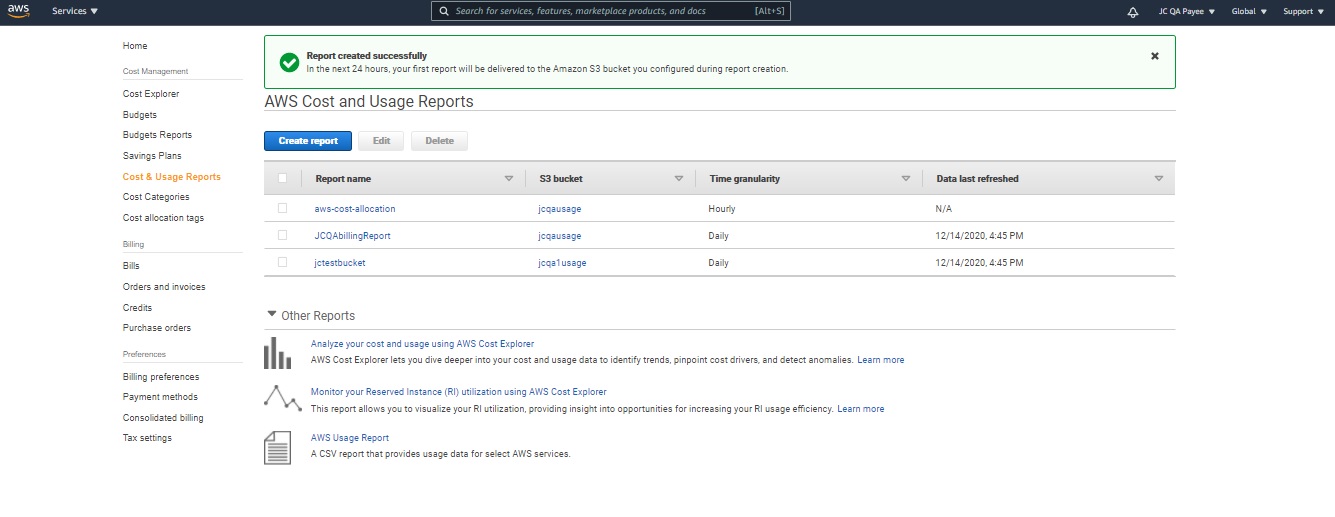
Report Creation
- Log in (as Paying Account) into AWS Console.
- Hover the mouse on the account name and click My Billing Dashboard option
from the drop-down.
- Click Cost & Usage Reports from the menu options.
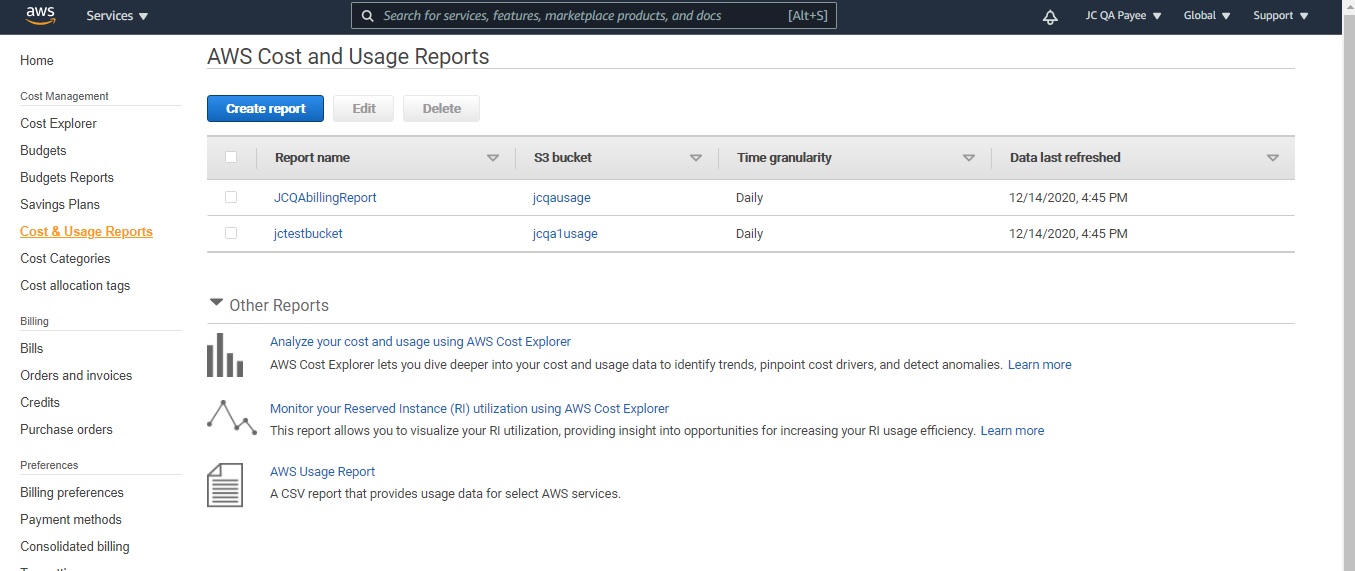
- Click Create Report.
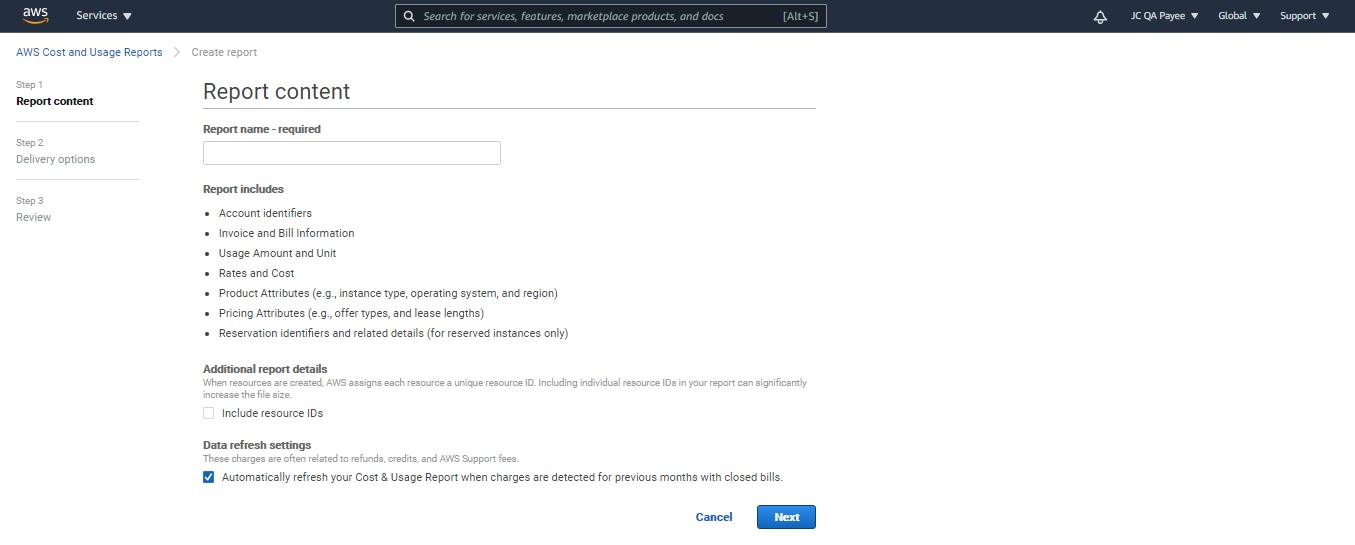
- Enter the details on the Create Report page and click Next.
- Report name* - aws-cost-allocation
- Include - Select Resource IDs check box
- On the Select Delivery Options page, enter the values as mentioned below
and click Next.
- S3 Bucket* - <<enter_proper_s3_bucket_name>> or click Configure to create a new one or select from the existing one.
- Report path prefix - jamcracker
- Time granularity - Select Daily radio button
- Report versioning - Select Create new report version radio button
- Enable report data integration for - Select the required report data integration
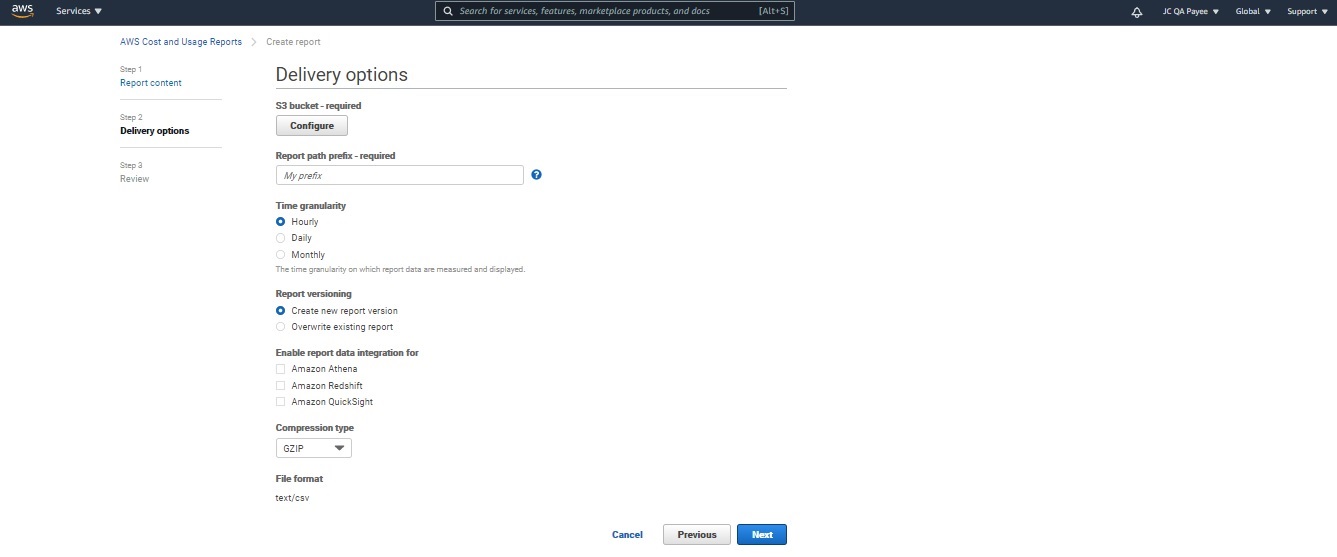
- Validate the details on the Delivery Options page, and then click
Review and Compete.
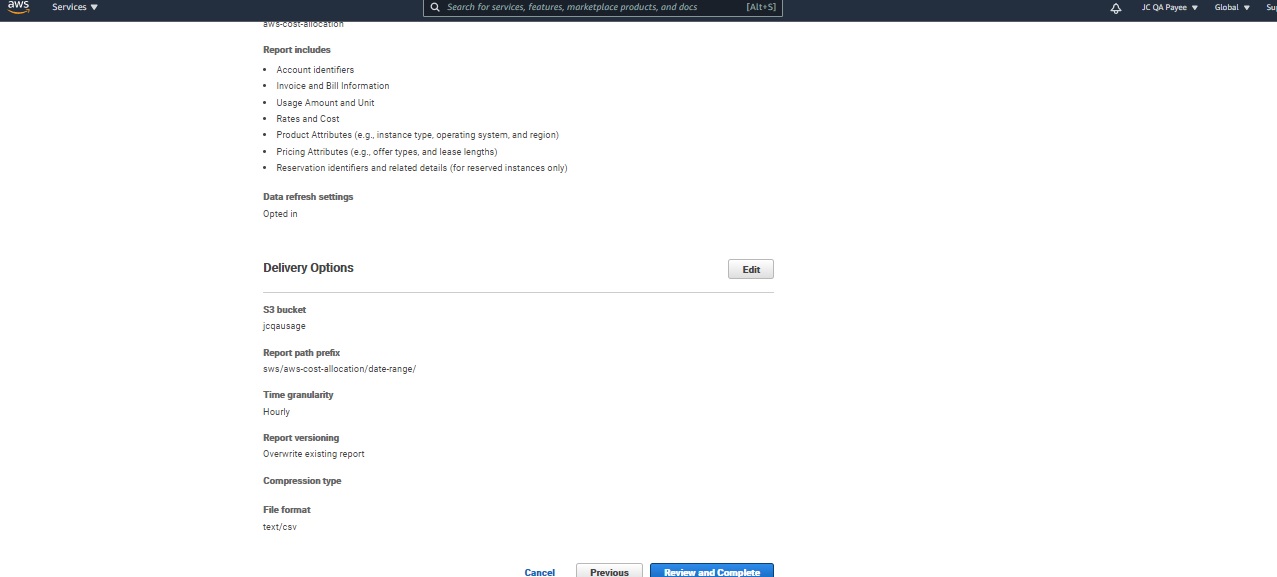 ``
``The newly created report is displayed.