vCenter Account Settings
In this section, we take you through the steps you have to perform while mapping your vCenter (Version 6.0) account with Jamcracker Appliance.
To map your vCenter account with Jamcracker Appliance, you must have the following information handy.
- Account ID
- User Credentials
- Auth Token (Authorization Token)
- vCenter Host/IP
Note: If you don't have the above required information with you, contact your
operations/network team for the same.
The Jamcracker Appliance supports multiple vCenter integration, you need to follow the below steps to integrate each vCenter.
So, let's assume you already configured vCenter account and Usage Meter.
Now, perform the following steps to map your vCenter account with Jamcracker Appliance.
- Login to Jamcracker Appliance.
- Navigate to Administrator > Member Management page.
- Click Store tab, and proxy into the store account.
- On the Store url, navigate to Store > Customer Management page and proxy into the Customer account.
- Now, navigate to Manage > Cloud Service Credentials page.
- On the Cloud Service Credentials page, click the Add Cloud Service
Credentials icon.
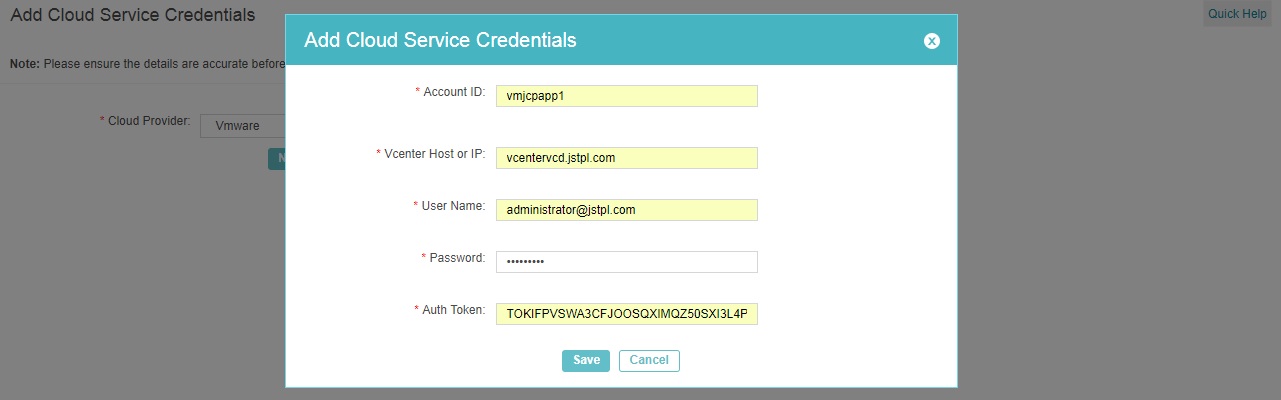
- Select vCenter (VMware)as your Cloud Provider from the drop-down list.
- Click Next.
- Type Account ID. You can type few unique characters (Only Alphabets) for your account ID.
- Type your vCenter Host/IP details. Note: Access the vCenter URL in the web browser (Google Chrome) and click View Certificate and refer to Issued to for the Host/IP details. The steps may vary based on the browser that you use.
- Type your username and password.
- Type Auth Token. Click here to know how to get your Auth Token.
- Click Save. Your Cloud Credentials is saved successfully.
- The status of your Cloud Credentials will be in "Waiting for
Authorization". To Authorize, click the Validate link from the
Actions column.
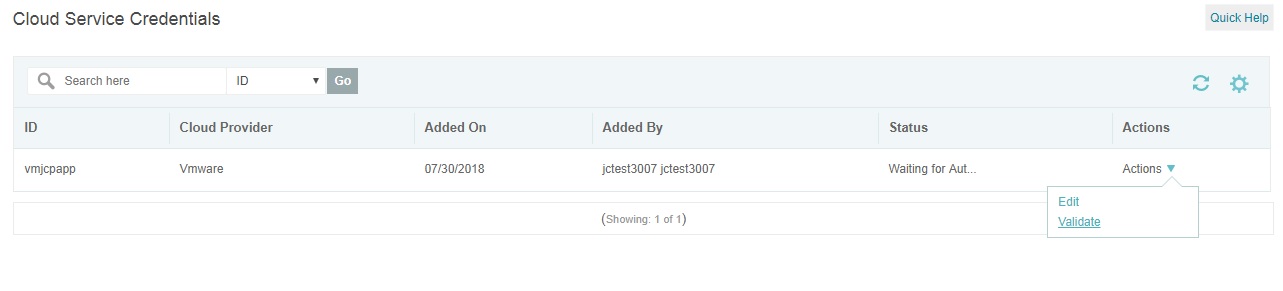
- Your account will become Active.
- Now, you can launch your VM from the store catalog. However, before launching your VM, you must configure your Vendors, Region, Image. So, to know how to configure these details, refer to On-Boarding OS Images.
- Launch your VM. Click here for more details on how to launch a VM.